Installation
Pre-installation Requirements
Oracle DBMS
You should have your Oracle DBMS installed before installing Vine software. If you do not have it installed on your server, please refer to the Oracle DBMS documentation for further information.
Please note that you will need to specify a path and size for Oracle data files used for the Vine server database, so check for free disk space in advance.
Note: If you are going to install Vine Server onto an already extensively used DBMS, please make sure your database backups are up to date.
VAS or Oracle client connection
While creating the Vine Server database you will need to connect as SYSTEM to the Oracle server. You can connect using either direct Oracle client connection or through Vine VAS:
- Direct Oracle connection. To connect directly to the Oracle server you have to install Oracle client software on a PC from which you are going to connect to the Oracle server.
- VAS connection. To connect through VAS (Vine Application Server) you have to install and configure VAS. Please refer to VAS documentation and Help system for detailed information about how to install and configure it.
Note You cannot install or upgrade Vine database using a VAS connection.
Vine Server Setup
You can install Vine Open Server or higher using Vine Server Setup wizard. Also you can use the Vine Server Setup wizard to upgrade Vine Open Server to the latest version.
To install the Vine Server Setup wizard you should use the latest installer which you can download from the support section of the Vine website: https://vine.eu
Creating Vine Server Database
Vine Server Setup is a wizard that will take you step-by- step through the process of creating a Vine database. You can refer to help text at the top of each window for brief information about each step. The following is a summary of the installation procedure with some notes:
- Run the Vine Server Setup wizard. The following window will appear:
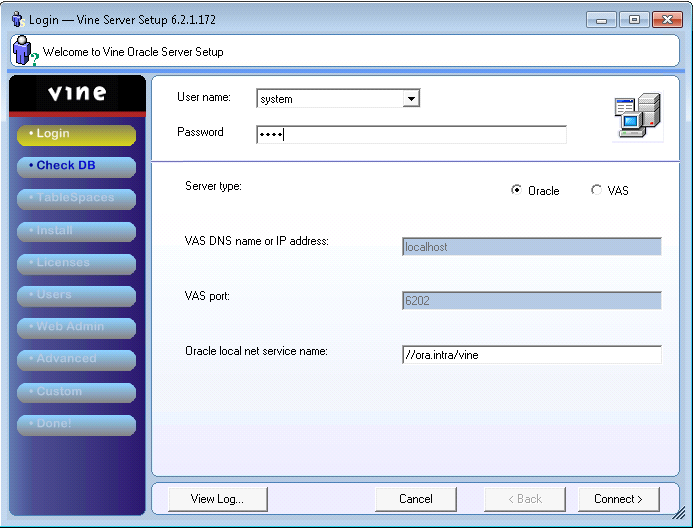
- To create a database, select username- ‘SYSTEM’. Enter the corresponding password.
- Select Oracle connection.
- For an Oracle connection enter its Local Net Service alias or you can enter a connection string in the //host/dbservice format.
- Click Connect.
- The wizard will open the Check DB dialog. You will be prompted to provide a password for the vineyarddb user which will be created.
Note: vineyarddb is the Vine objects owner who controls Vine database components
All other options will be disabled.
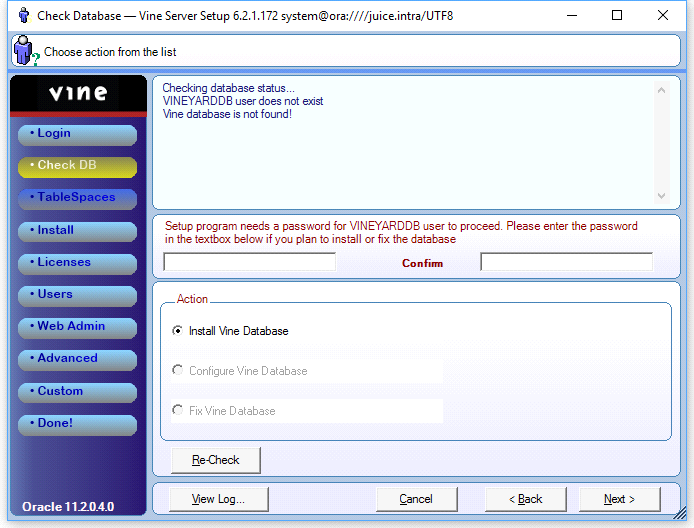
Click Next.
- At the TableSpaces step, you will be asked to choose an existing or create a new tablespace.
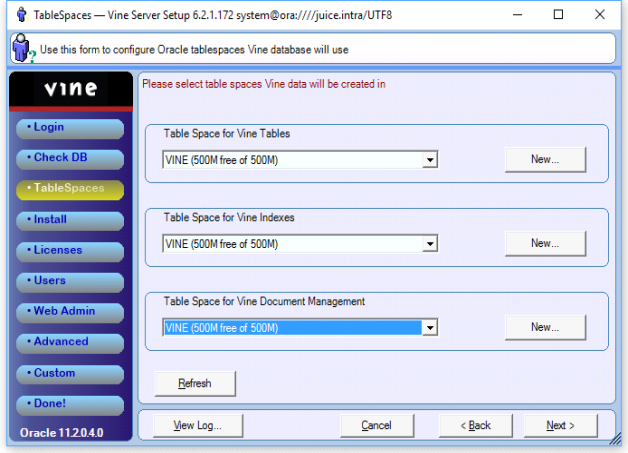
If you do not have Vine tablespaces yet, then click New…. In the next dialog box enter a name and other settings of the new tablespace:
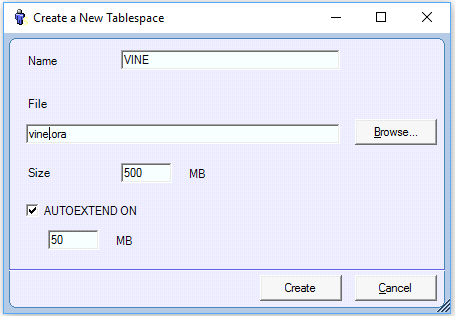
Please note that Browse… shows the file system of the computer where Vine Server Setup is running. If you are installing the database remotely and you want to specify a separate folder for the tablespace file then you have to provide the correct path yourself.
Select tablespaces for Vine Tables, Vine Indexes and for Vine Document Management component. If you are unsure you can use the same tablespace for all Vine database contents.
Click Next.
- You should then be informed that the wizard has enough information to create a Vine database:
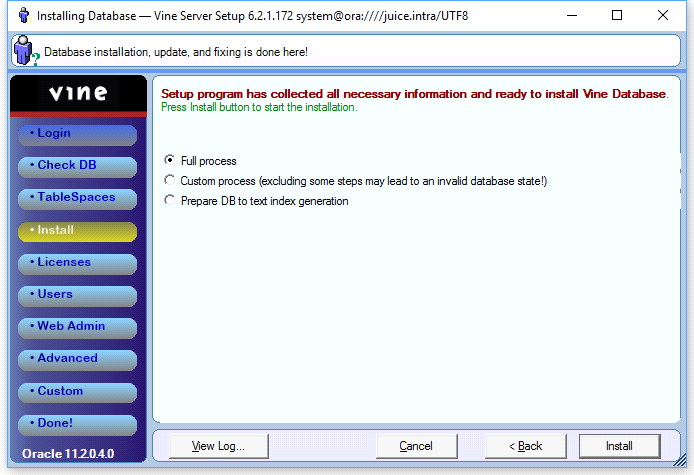
This is the last step before the database is created. Click Install to create the database. Vine Server Setup will be listing its actions, making it possible for you to monitor the creation process:
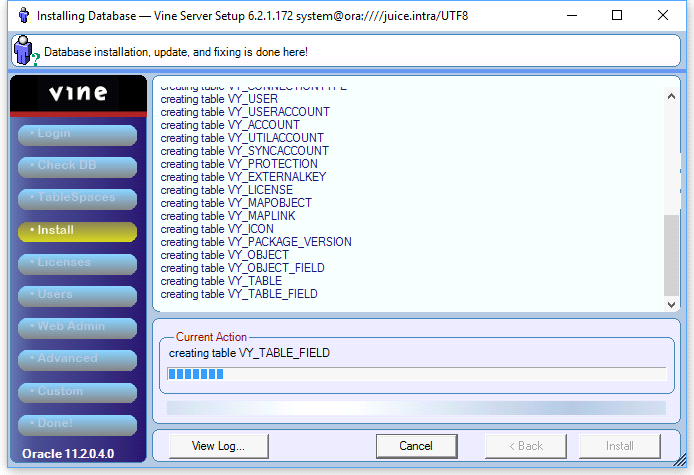
If the database has created without any errors or warnings then you can go to the next configuration tasks.