Landing Pages
In the Vine Marketing Automation tool you can create your own professional looking landing pages and then add links to them in emails you send.
You can find landing pages on the Landing Pages tabbed page on the Web Site page. To open the page please select Web Site in the left menu and then select Landing Pages tab.
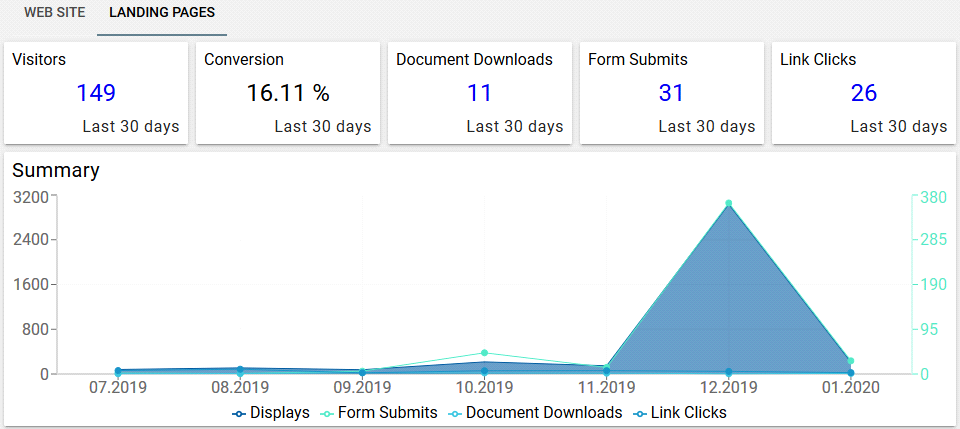
- Visitors - shows how many people (recognized and anonymous combined) visited landing pages in this and the previous months.
- Conversion - shows the ratio of counts of unique recognized visitors who submitted a form or clicked a link vs. count of page displays.
- Document Downloads - shows how many documents were downloaded from landing pages in this and the previous months.
- Form Submits - shows how many times forms on the pages were submitted in this and the previous months.
- Link Clicks - shows how many times links on the pages were clicked in this and the previous months.
Click New to create a landing page.
Selecting Landing Page
You can see all existing, previously saved landing pages in the Saved Landing Pages folder:
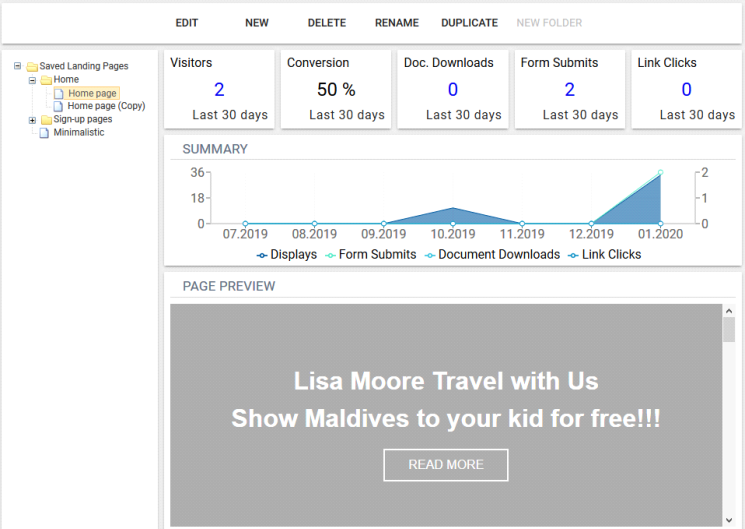
Select a landing page on the left and click
- Edit if you want to modify the page.
- New if you want to create a new page.
- Delete if you want to remove the page from the database.
- Rename if you want to change the name of the page.
- Duplicate if you want to create a copy of the page.
To arrange pages better you can add or change folders:
- To create a sub-folder in a folder: select the folder and click NEW FOLDER. A sub-folder with the name "New folder" will be created.
- To rename a folder: select it, click RENAME and type in a new name.
- To delete a folder: select it and click DELETE. The folder will be removed.
Please note that you can drag pages and folders between folders. You have to drop a page (or folder) on a folder's name where you want to move it.
Creating a Landing Page
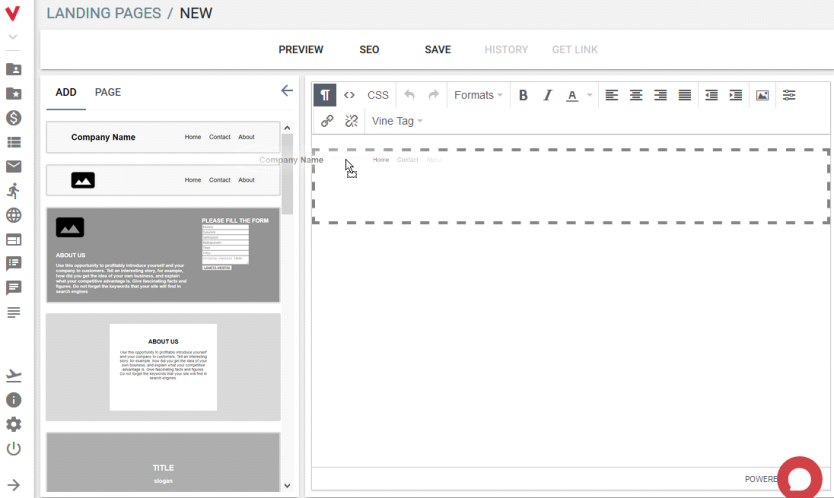
Click New on the Web Site / Select Landing Page:
An empty Edit page will appear.
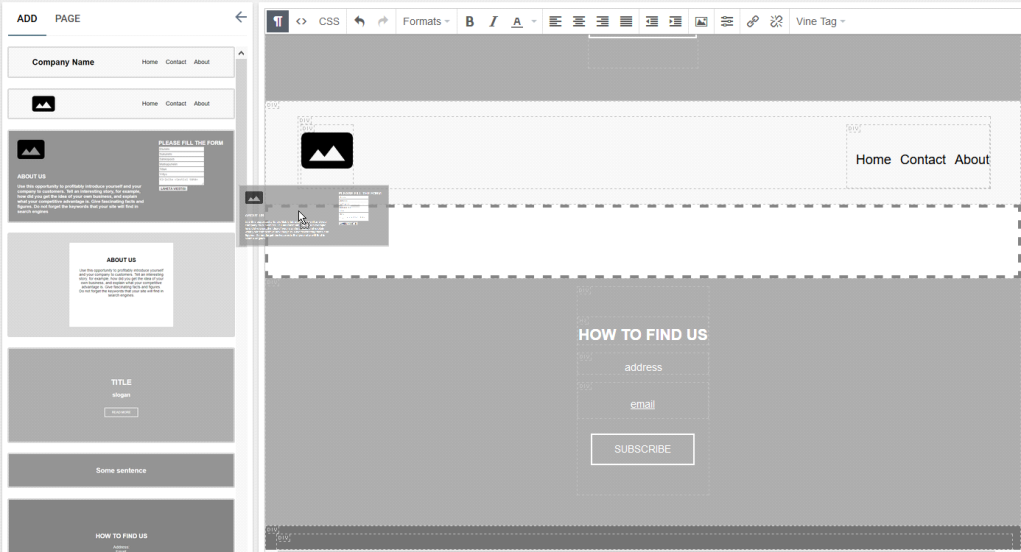
Click Add in the left side pane, to open the Add tab where chapter templates are located. Your landing page will consist of these templates which you should drag to the editor and customize there:
Configuring Landing Page Settings
To specify page sharing and search engine optimization tags for your landing page click SEO. The following dialog will appear:
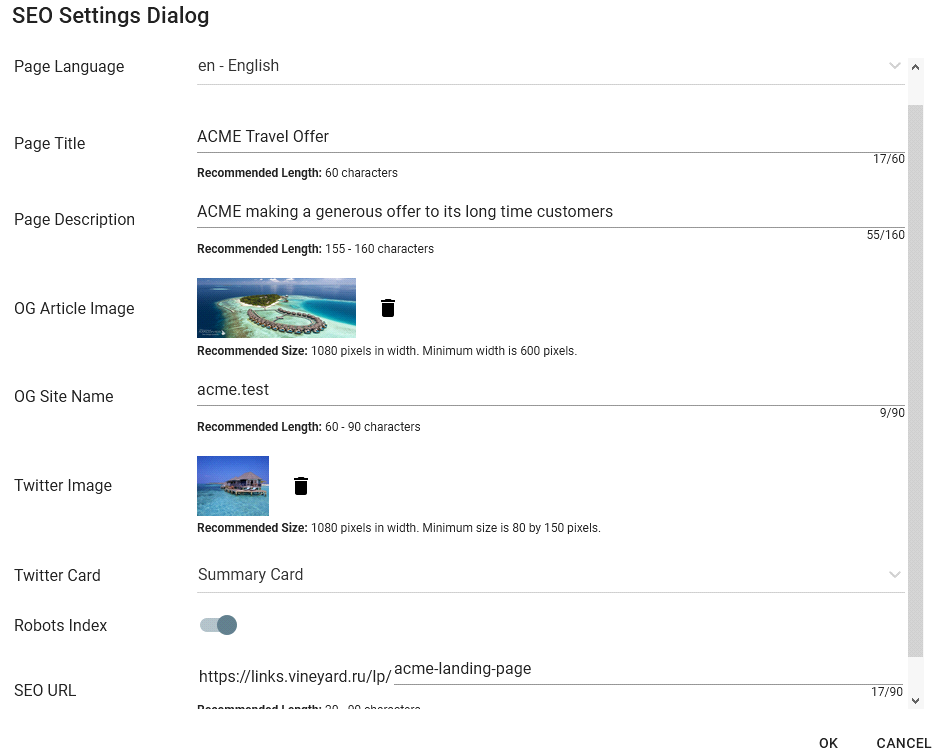
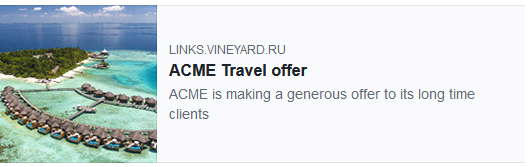
Using these settings you can, for example, configure how your shared page will look on Facebook :
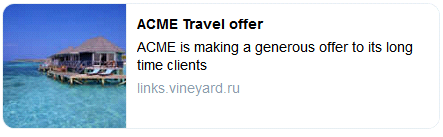
or Twitter:
The Page Language setting sets the lang HTML attribute, which is used, for example, for Vine chatbot language, as well as defines the language of Custom Web pages open using links in a landing page.
The SEO URL setting allows you to create a short and SEO friendly URL for your landing page.
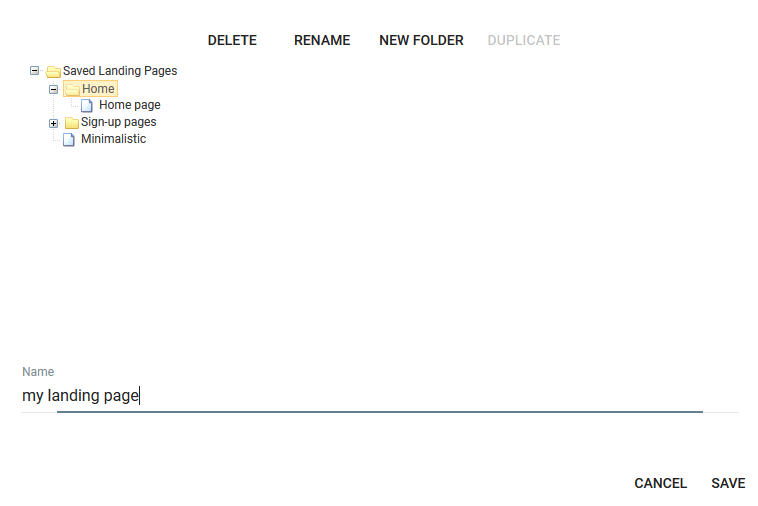
Saving a Landing Page
While working with a landing page, it is recommended to periodically save it.
- Click Save to save the current page.
- In the dialog that will appear, select a folder or create a new one.
- Type a name of your landing page.
- Click SAVE.
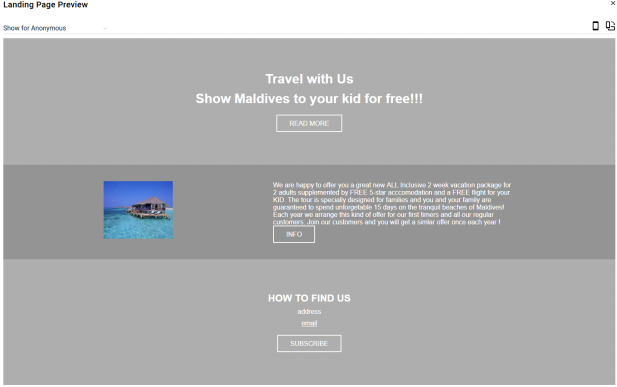
Previewing Landing Page
Click Preview to assess how your landing page will look for different visitors and on different devices:
- Select Show for Anonymous to see how the page will look for anonymous visitors:
- Select Show for Identified to see how the page will look for known visitors:

Click  to see how your page will look on a screen of a mobile phone.
Click  to rotate your mockup phone horizontally. Click the icon again to rotate the phone back vertically.
Reverting to Previous Versions
You can revert to any previous version of a landing page. Click History and then click any previously saved version to revert to it:
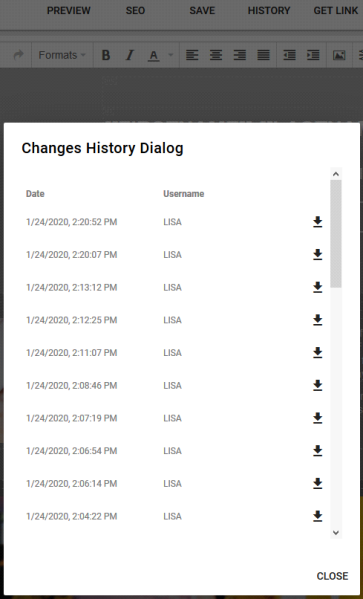
The clicked version will be loaded to the editor and you can save it, if it is the one you need.
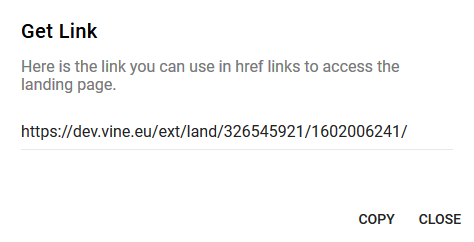
Getting Web Address of Your Landing Page
Click Get Link to copy a link to your page which you can use for example in HREF links
Toolbar Commands
|
Button |
Name/Info |
Description |
|
|
Show Blocks |
Displays dotted frames around block-level elements with labels. |
|
|
Source Code |
Edit HTML source code |
|
CSS |
Custom CSS |
Click this button to add custom CSS to your page. (Please note that you should not manually edit CSS in the top style tag of the page as your changes will be discarded when the top style tag will be rewritten.) |
|
|
Undo/Redo |
|
|
|
|
Select text and select styles from this list to apply to the selected text. Several styles can be applied at the same time. (Applied styles have a grey bar to the left.) |
|
|
Bold |
Select text and click this to make it bold |
|
|
Italic |
Select text and click this to italicize it |
|
|
|
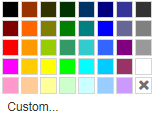
Select a color for the selected text from the Text Color dialog. |
|
|
Align Left Align Center Align Right Justify |
Select text and click this to align text to the left, center it, align to the right, or justify text ( text spaces adjusted so that the text gets aligned with both the left and right margins) |
|
|
Decrease Indent |
Click this to indent less |
|
|
Increase Indent |
Click this to indent more to the right |
|
|
Insert/Edit Image |
Click this to insert/edit image, for example a logo image. |

|
Click here to set various Page Settings, such as colors. |
|
|
|
Insert Link |
Click here to insert link. |
|
|
Remove Link |
Click this to remove link. |
|
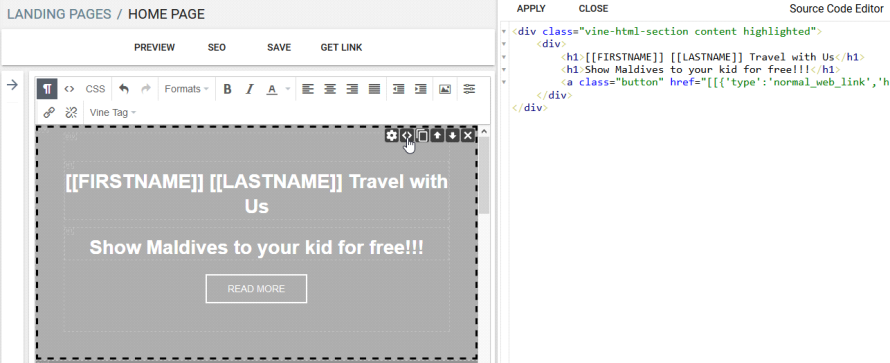
Vine Tag |
Click here to insert Vine tags, for example, "Person first name" |
|
|
Dynamic Text |
Inserts a placeholder in your landing page which will be replaced on the fly by a URL parameter value appended at the end of a clicked web link |

Using Dynamic Text
Adding Dynamic Text Placeholder
You can use special "Dynamic Text" placeholders in your landing page. The Dynamic Text placeholders will be replaced by the URL parameter values that appear at the end of a clicked web link (This is further demonstrated below)
To insert dynamic text:
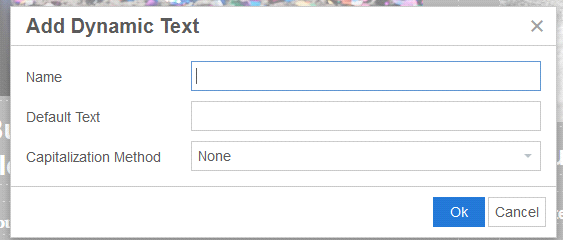
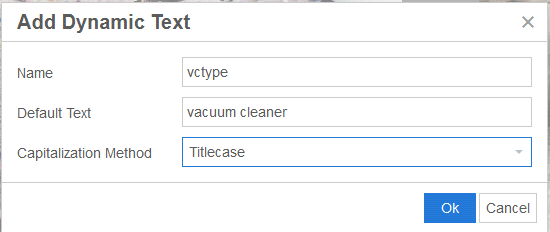
- Place the cursor where you want a dynamic text placeholder to appear.
- Click Dynamic Text in the toolbar.
- In the Name field, type the name of the URL parameter you want to use.
- Enter default text that will be inserted in the landing page if the parameter value is not available for any reason.
- Select the capitalization method:
- None. Insert the text exactly as it is passed in the URL parameter.
- Title case. Capitalize the first letter of each word, for example, "Vacuum Cleaner"
- Sentence case. Capitalize only the first letter, for example, "Vacuum cleaner"
- Lower case. No capitalization, for example, "vacuum cleaner"
- Upper case. All caps, for example, "VACUUM CLEANER"
- Click OK to save the placeholder.
Your placeholder will be inserted, as follows:
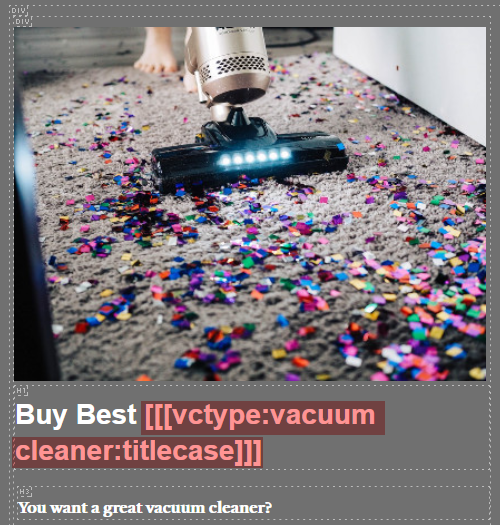
If needed, you can edit or remove a placeholder manually.
Please note that you can insert multiple dynamic text placeholders in one landing page.
Testing Dynamic Text
To test a dynamic text placeholder:
- Click Save in the top toolbar to save the landing page.
- Click Get Link and then Copy.
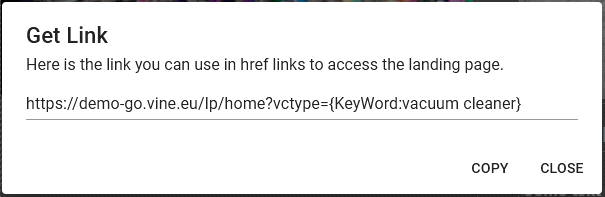
- Now go to your browser, paste the copied URL into the address bar, replace the {KeyWord} part with any parameter value you like and make the browser show the page:
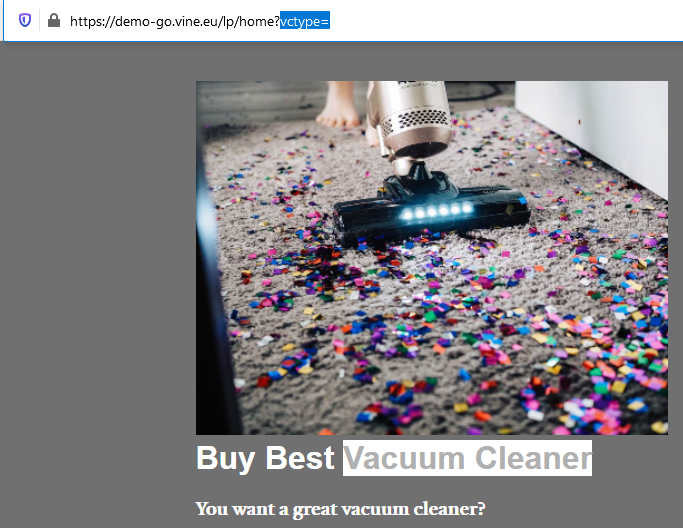
You can remove the parameter value to test the default text too:
Using with Google Ads Keywords
If you are using an advertising platform, such as Google Ads, then you can combine Vine Dynamic Text with dynamic keyword insertion from Google Ads. With this combination, you can automatically replace the text on your landing page with the specific keywords the user typed in a search.
-
In Google Ads you can create an ad that automatically inserts the search terms/keywords to the selected sections of your Vine landing page.
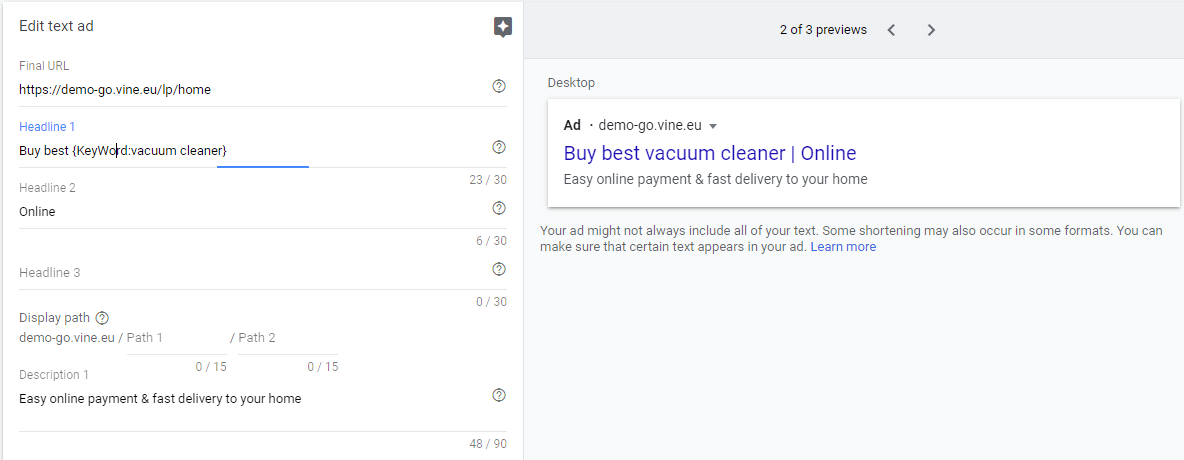
For example, let's say, we have created the following dynamic ad linked to our landing page (https://demo-go.vine.eu/lp/home):
This ad will appear in Google Search results when the user types a set of keywords matching well the ones we choose for our ad.
For example, when the user types in Google search the following keywords:

the ad above will dynamically replace the {KeyWord} placeholder as follows:

- Modify Final URL (or Final URL suffix) to pass the search keywords to Vine landing page:
Now we want that when a prospect clicks this ad, the text in our landing page will also adjust to the search terms. For this we need to pass the keyword value from Google Ads to our landing page using the URL parameter "vctype" that we will define as follows:
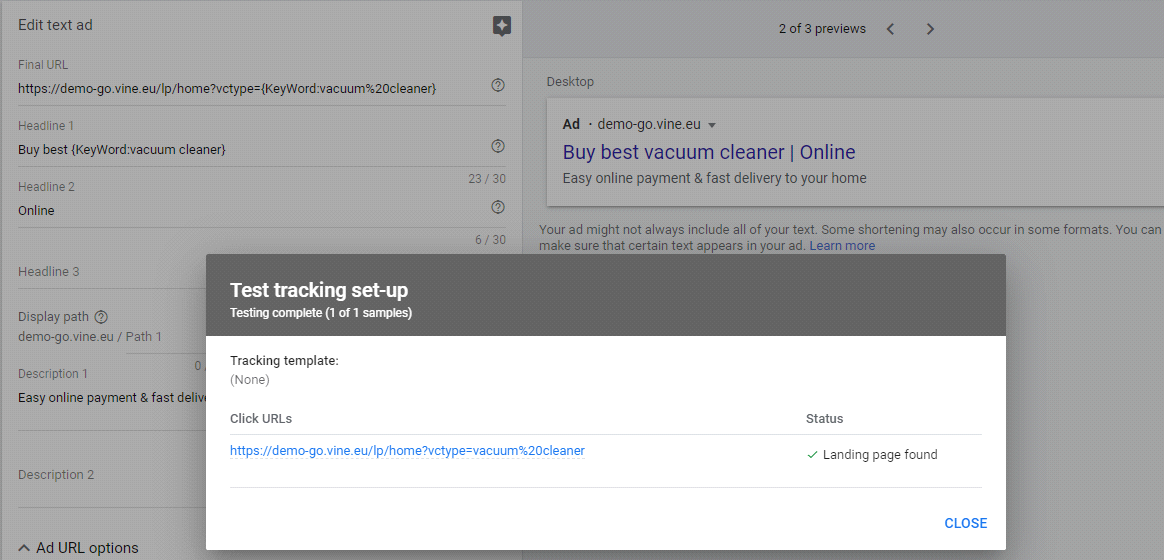
To sum up:
-
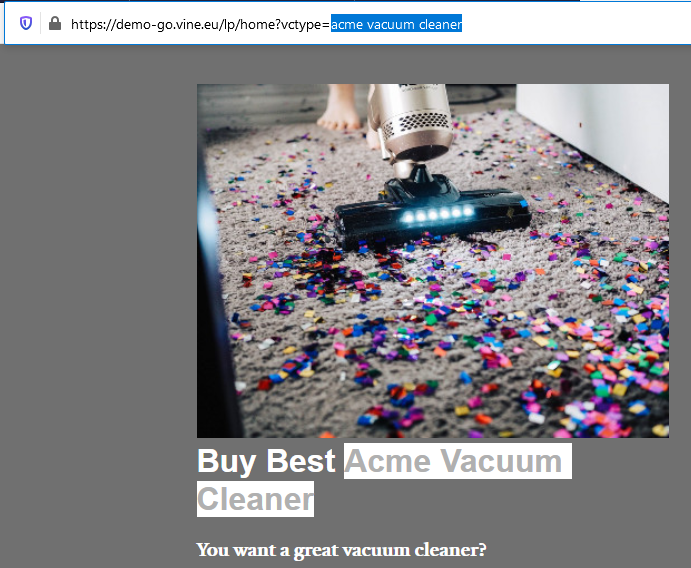
Now when a prospect types, for example, the following search terms in the Google search
- The search results page will display the following dynamically adjusted ad:
- Clicking the ad link will show our landing page with dynamically adjusted text matching the source search request:
Configuring Page settings
Click Page in the left side pane, to configure the general settings for the whole landing page:
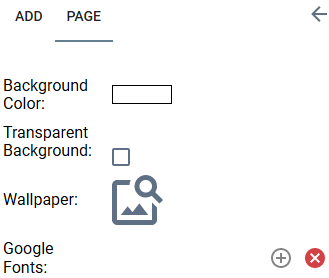
Adding Google Fonts
To add Google fonts so that they become available for all elements on the page:
-
Open the Page tab and click
 next to Google Fonts:
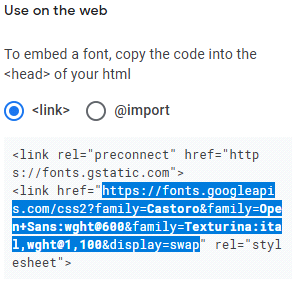
 - If you have already built an URL with the fonts you want to add on the Google fonts site (https://fonts.google.com/) then simply paste it to the Font URL field in the Import Google Fonts Dialog. Otherwise, please click "link" in the dialog, build your URL and copy it like this:
- Then paste the URL in the Font URL field:
- Click OK to import the fonts.
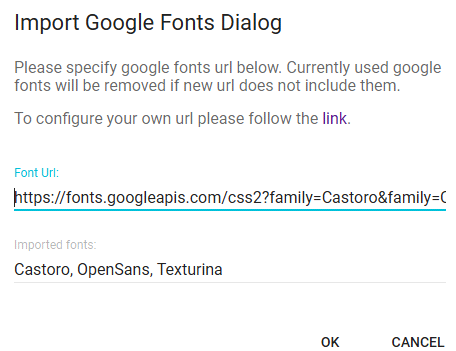
The Imported fonts field will automatically show the names of imported fonts.
Useful Keyboard Shortcuts
Ctrl + z - Undo
Ctrl + y - Redo
Ctrl + b - Bold
Ctrl + i - Italic
Ctrl + u - Underline
Return - New Paragraph
Shift + Return - break
Adding & Editing Chapter
Adding a chapter
Click Add in the left side pane to open the tab listing chapter templates. Scroll to the chapter you want to add and drag it to the place where you want to insert it in the editor:
Moving a Chapter
Select the chapter you want to move and click the Up arrow to move it up or the Down arrow to move it down.

Creating a Copy
Select the chapter you want to copy and click the Copy icon ![]() . A copy of the chapter will be inserted right after the current chapter.
. A copy of the chapter will be inserted right after the current chapter.
Removing a Chapter
Select the chapter you want to remove and click the cross sign.
Editing Chapter Source Code
Select the chapter which HTML source code you want to change and click ![]() .
.
Configuring Chapter Settings
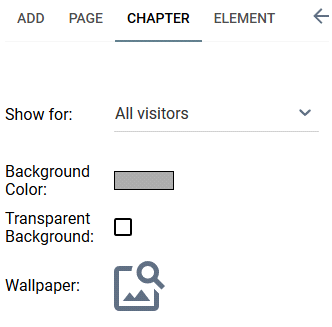
Select the chapter you want to configure and click Chapter in the left side pane, to configure the chapter settings:
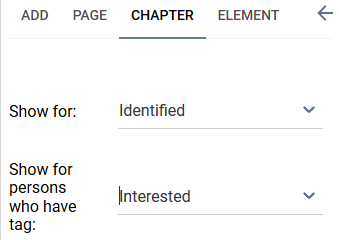
- Use the Show for list to set the chapter’s visibility settings. Use this, for example, when you want to show the same chapter but with different content for anonymous and identified visitors.
- For identified persons you can make the chapter visible only to those with a specific tag. For this, first, select Identified from the Show For list and then select a tag from the Show for persons who have tag list:
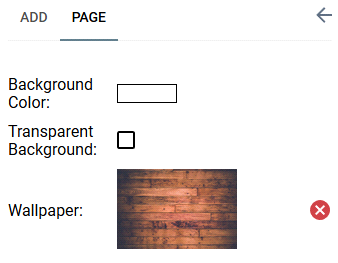
- Set the background color. You can select the needed color from the dialog or enter it by hex, or in rgb.
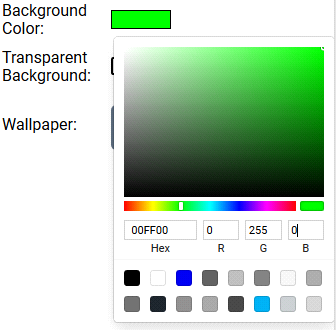
- Select Transparent Background if you want the background color to be transparent.
- Click
 next to Wallpaper if you want to load an image to use as wallpaper for the chapter. Click
  to remove the wallpaper image.

Selecting a Form
If a chapter template includes a form then click in the form DIV:

The Form tab will appear in the left side pane:
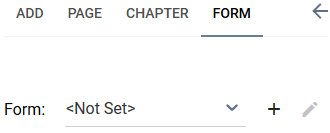
This list includes all web and bot forms available to you in Vine Marketing Automation. Please select a form from the list to use it in this chapter. Click + if you want to create a new form or click  to edit the selected one.
Configuring CSS for Chapter Elements
You can specifically configure CSS for individual elements on your landing page.
Click inside an element you want to set CSS for.
The type of the selected element and its current styles will be shown on the Element tab:
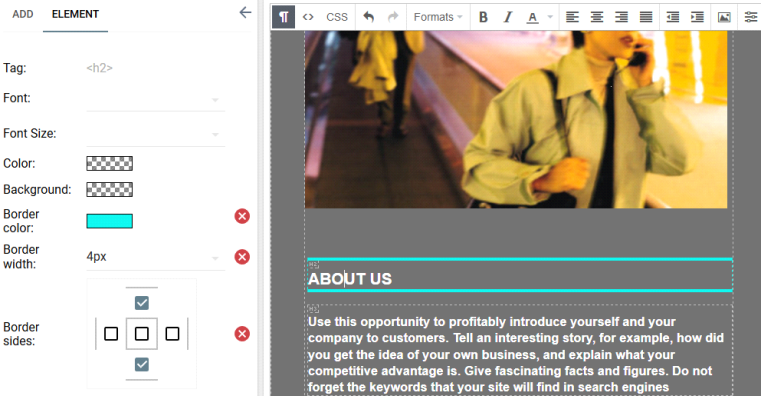
Checkered background is shown for elements with no color set.
Select the needed inline style settings for the current element. To remove a specific style, click  next to it.
When choosing a color for an element, you will see a choice of all colors already used on the current page. Simply click in the square with an already used color to pick it again for a new element:
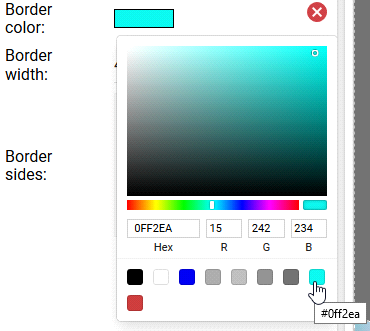
Click anywhere outside of the dialog to confirm your color selection and close the dialog.
Hit Esc if you want to discard your selection and close the dialog.
Adding and Editing Images
Image placeholders must be replaced with your images:
-
Select the placeholder (or the image) you want to replace:
-
Click the Insert Image button
 on the toolbar and locate your image file:
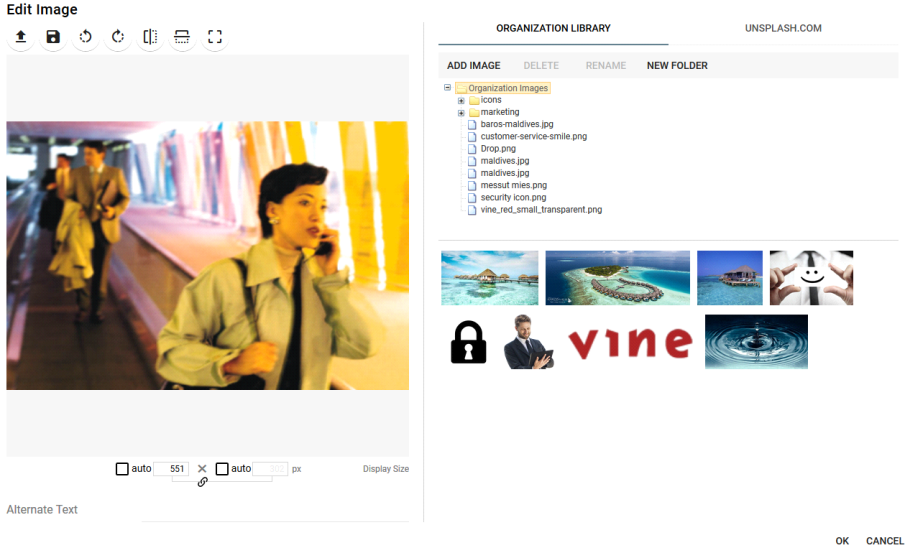
You can also add an image from the web by entering its full web address(URL) in the Source field.
-
Click OK.