Settings
The Settings page shows your account data and allows configuring all the settings required by Marketing Automation.
Account Tab
Your Account
The Account pane shows your Vine account data and allows you to change your password. It is recommended to change the password after the first login.
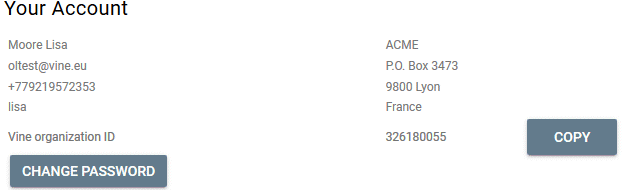
(Your account data is taken from your registration request and you currently cannot change it in the Marketing Automation. For now, you can change your account data only in Vine CRM if you are a Vine CRM user.)
Click Copy to add your organization ID to the clipboard.
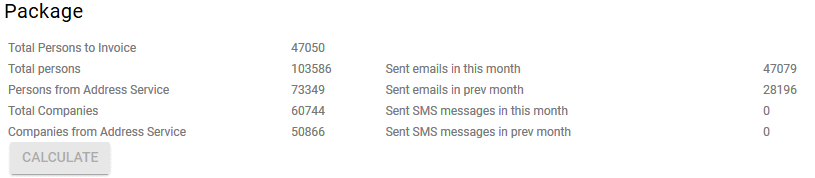
Package
The Package pane lists usage data your invoice will be based on. Click Calculate to get the data:
If needed you can change your Marketing Automation plan:
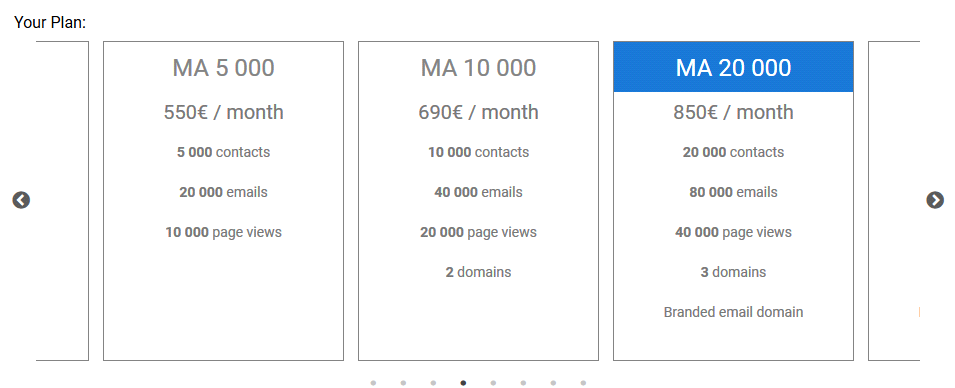
The monthly price will be calculated according to the plan you have selected at the end of the month, but Vine will additionally charge for extra data you used in this month above the currently selected plan. In general, to optimize the costs, it is recommended to have a plan just covering all the data you have used this month.
Please note that once you select a new plan you cannot go back to the initial MA Start Package.
Invoicing
In the Invoicing panel you need to enter data required by Vine to send invoices to you.
Demo data
In the Demo Data pane you can add (and remove later) demo data which you can try the tool with until you have your own data.

Note: Please remember to remove demo data before you start any real use of Marketing Automation.
Unused Persons
Click Delete Unused Persons if you want to clean your database from persons who have not been used for more than a year (persons who have not been changed in Vine, and no email sent to, and no event connected) excluding persons from the Unsubscribed list, Contacts of all users, and employees of customers.
Click Calculate to get the data.

Click Export Unused Persons to Excel if you want first to examine persons to be deleted.
Company Information
Vine provides a default Privacy Policy page required by the EU. You only need to enter you company data and the policy page will be generated for you automatically.

Before using you can preview the page.
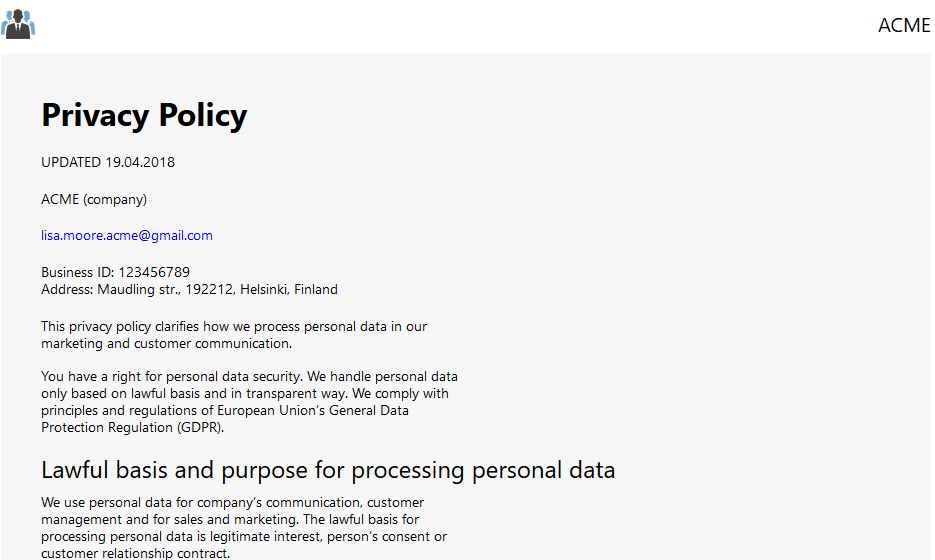
You can add a link to your generated Privacy Policy page to the footer of Vine email templates (if it is not already there).
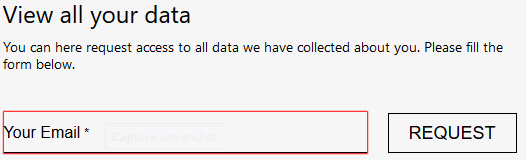
Right of Data Access
At the bottom of the default Privacy Policy page there is a form where people can enter their email addresses and request to see their data collected by Vine:
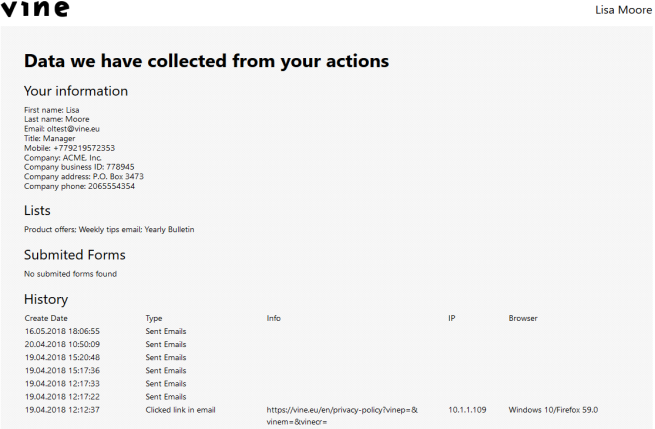
Vine will send an email to the provided email address with a link to see the data:

By clicking View All Data Link, the person can see all the data required to be available for access by the GDPR law:
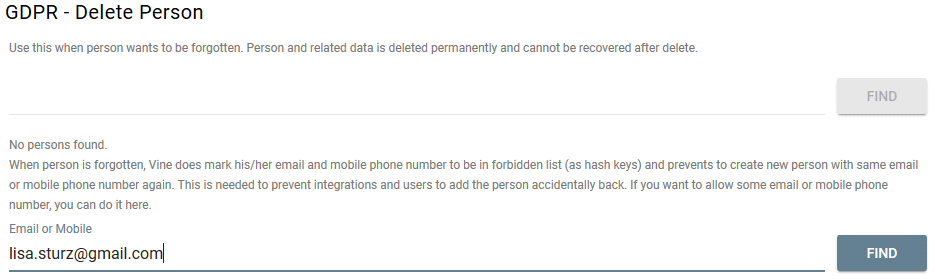
GDPR - Delete Person
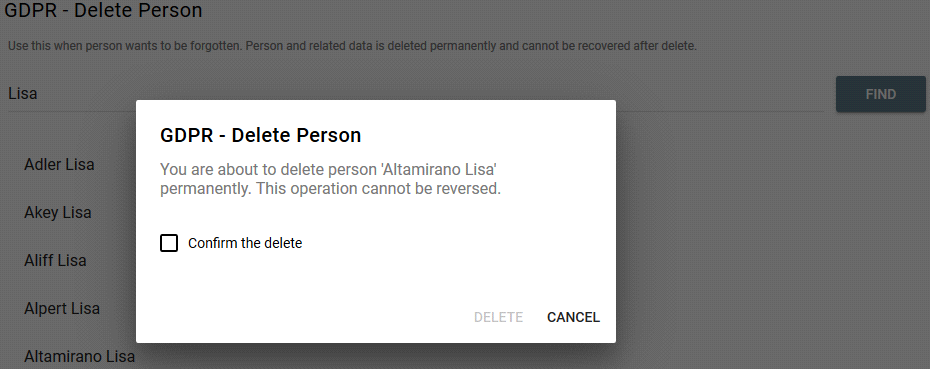
Forgetting Person
In the GDPR - Delete Person pane (available only for users with the Admin role), you can completely remove all the data on a person ( for example, if you have received a Data Erasure request) in your database.
- Enter a person's name and click Find.
- In the list of found persons click the one you want to remove.
- Select Confirm the delete and then click Delete.
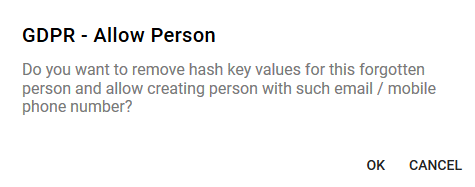
Allowing Forgotten Person
If you need to allow using a "forgotten" person (person whose data you have removed from Vine), you can do it using the person's email address or phone number.
To allow a previously forgotten person:
- Enter the person's email address or phone number in the bottom Find edit box and click Find:
- If the person is forgotten then you will see the following dialog:
- Click OK to allow using that person again.
Please note that Vine does not keep any data on forgotten persons. Instead, Vine prevents adding forgotten persons again by storing their emails and/or phone numbers as hash values (numerical codes uniquely identifying data, but without possibility to decode data). So when you ask to allow a person by entering an email or phone, Vine generates a hash value from it, compares to hash values of forgotten persons, and allows the person if it finds a matching hash value.
Address Service Tab
Address Service
On the Address Service pane you can configure loading from Address Service .
Select the email list where you want to add persons loaded using the Address Service:

Please note that this will be the list which you will have to open to use the Load from Address Service command.
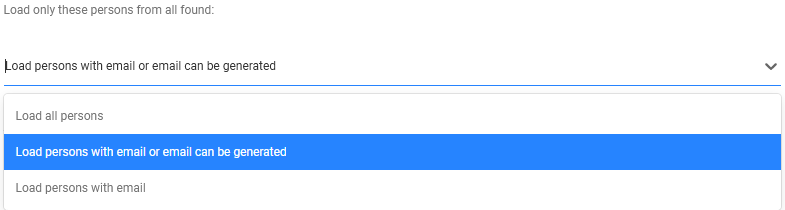
When you use the Load From Address Service page, you will define criteria for companies and connected persons you want to load. Use the options in the next list to additionally specify if you want to get only persons with email addresses:
- Select Load all persons if you want to load all found persons regardless if they have email address or not. (This is recommended if you are also a user of Vine CRM)
- Select Load persons with email or email can be generated if you want to load all found persons with email address or Vine can generate email addresses. In this case all loaded persons will have an email address, either original or generated by Vine.
- Select Load persons with email if you want to only load persons which have email addresses in the Address Service database.
When you load companies and persons from the Address Service you can additionally want to load all employees of loaded companies even if those persons do not match your criteria. For this you need to select Load all persons from companies. Otherwise, if you only want to load companies and persons matching your criteria then make sure it is cleared.

Please also note that if Load all persons from companies is selected then new persons can be added to the target group also during nightly database updates.
Select Find employer using domain from email of person if you want to try to detect employer companies for persons not present in Address Service. Vine will use the domain part of the email address of a person not in Address Service and try to find a company in Address Service with the email address having the same domain part.
Select Also match persons using only email, if you want Vine also to try to match new persons in your database to persons in Address Service only by person email. If emails of persons match, then missing data in Vine (for example, no employer company) will be copied from the Address Service to Vine.
Click Set Suggested Settings if you want to select options recommended by Vine.
Address Service Nightly Updates
All companies and persons in your database will be matched at night to Address Service data. Matching companies and persons will be updated in your database to be the exact copies of the ones in the Address Service.
If a person has been removed from the Address Service then an event about this will be connected to the person.
Please note that for a matching company its all new employees will be also loaded to the database if Load all persons from companies is selected. In addition, employer companies of these new persons will be loaded and so on until there is nothing to load. This may affect you invoice so select Load all persons from companies with caution.
Web Site Tab
Tracking
The Tracking pane includes data required for Vine tracking of your web pages:
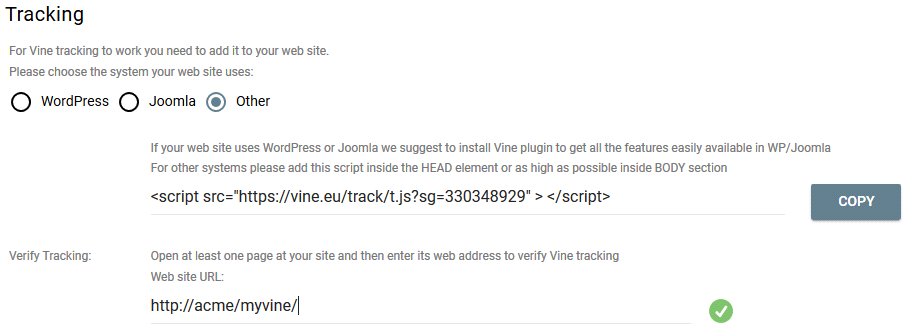
If you created your site using WordPress or Joomla then you can add Vine tracking and Vine web forms to all your web pages using the WordPress Vine plug-in or Joomla Vine plug-in, respectively.
For all other systems, select Other and then copy the given script and insert it to the HEAD or BODY of all web pages you want to track
Verify Tracking
Use the address of your web site to check if the script is installed correctly. You need to have opened at least one page at your site in the last 48 hours for this check to work. In addition, you can check individual pages by entering their full web addresses.
Please note that a warning banner will be shown when there is no visits to your tracked web pages in the last 48 hours:

Tracked Domains
In a future version of Vine Marketing Automation, Vine will limit tracking only to domains specified by you. You will no longer need to worry about some pages on the internet spoiling your statistics by copying the tracking code from legitimate pages in your domains.
To prepare for this, please use the Tracked Domains pane to list domains you want Vine to track:

Conditional Content
You can use the following CSS classes to implement simple conditional content in your web pages.
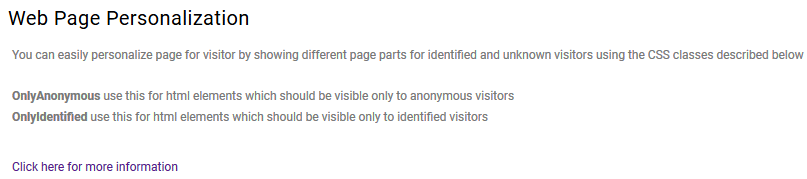
Use the OnlyAnonymous CSS class to show page elements to only unknown site visitors and the OnlyIdentified class to show page elements to only identified visitors.
Please note that it is recommended to mark the element hidden by default. Otherwise, it will be visible for a brief moment before the identity of the visitor is checked.
For instance, you can show a registration form to a new visitor and offer a link to a special custom landing page to a known person :
New Visitor (Anonymous)
<div class="OnlyAnonymous" style="display:none">
<p>Welcome to our site ! Please register to start your loyalty program:</p>
<div class="VineForm" data-form-id="1300367967">Registration Form.</div>
</div>Known Visitor (Identified)
<div class="OnlyIdentified" style="display:none">
<!-- show custom welcome message-->
<div class="VineForm" data-form-id="1300367947">Welcome back form</div>
<!--link to custom landing page -->
<a href="https://vine.eu/ext/land/1300357856/1547643138/" target="_blank">Click here for your personal offer</a>
</div>
You can implement much more complicated cases of conditional content using Java Script functions described in the Vine Developer's Guide.
Page Score Settings
You can set a page score for each page type:
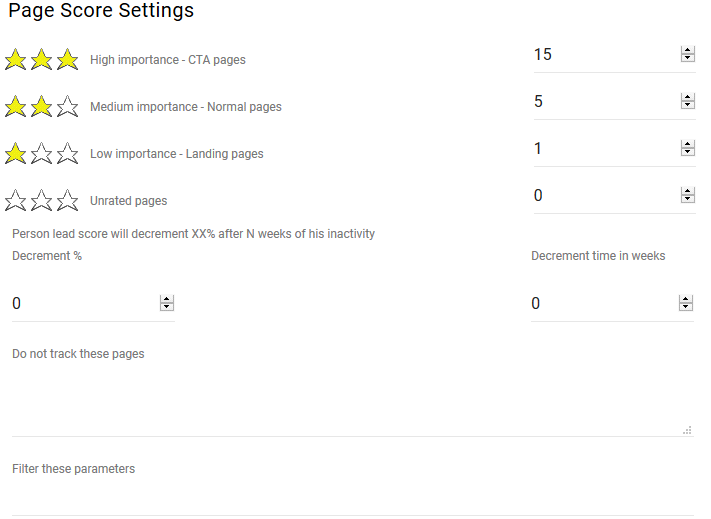
Setting Points Decrement Settings
A person’s lead score goes up after each page visit but you can configure for the score to go down if a person has not been visiting any pages for some time:
Set the lead score decrement value in percentages in the Decrement % field and set the inactivity time in weeks after which you want to apply this decrement in the Decrement time in weeks field.
Filtering pages and parameters
Use the following settings to skip or filter tracking:
- Do not track these pages - here you can specify pages which you do not want to be tracked.
- Filter these parameters - here you can specify which URL parameter values you want to be removed from page URLs.
Configuring Customer Web Settings
Using the Customer Web Settings panel you can edit Customer Web pages.
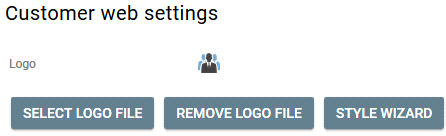
Click Select Logo File to choose an image that will be displayed at your customer web pages. All popular image formats are supported.
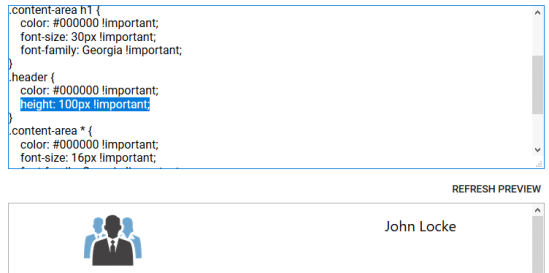
The selected image will be scaled to 100% of the header height. The image width will be scaled appropriately. You can change the height of the image in Customer Web CSS styles , for example as follows:
To remove the logo image, click Remove Logo File. The Vine logo will be shown by default if there is no your own logo file.
Click Style Wizard to adjust styles for your Customer Web pages
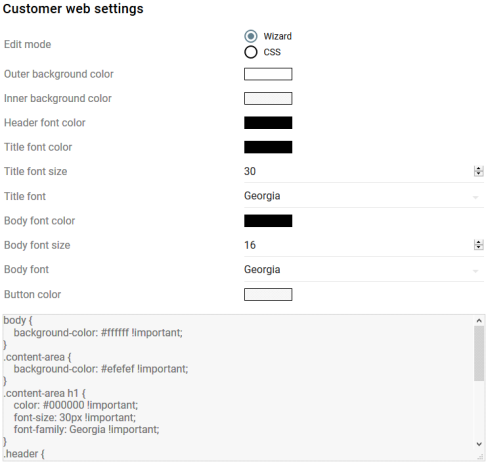
- Select Wizard if you want to change CSS styles using visual editing elements.
- Or select CSS if you want to edit CSS styles directly.
To see your style changes applied in preview, click Refresh Preview:
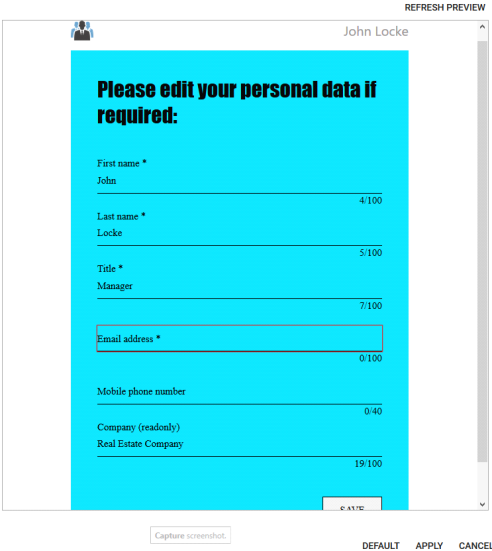
- Click Default to revert to the regular settings set by Vine and close the Settings dialog.
- Click Apply to save your settings and close the Settings dialog.
- Click Cancel to close the Settings dialog without saving your settings.
Cookie Consent
In the Cookie Consent pane you can design your own cookie consent banners or pop-ups by selecting a layout from several WYSIWYG templates, and adding your own texts in as many languages as you like.
Using Vine Cookies with Third Party Consent Dialog or No Consent
Select the first image to allow cookies without user consent
To comply with the European GDPR law, select Requires VineTrack.allowCookies call before using cookies so that the Vine cookies can not be saved until you call VineTrack.allowCookies(); in your JavaScript code in each page load.
You should select this setting, if you want to have your own or third party cookie consent dialog and allow Vine cookies only after the user accepts cookies in your dialog.
You can call VineTrack.denyCookies(); to remove user consent if it was given earlier.
For example, here is how you can integrate Vine cookies to be used with Osano consent dialog (in its simplest compliance type: “Just tell users that we use cookies”):
Integrating Vine Cookies with Osano Consent Dialog
<script>
window.cookieconsent.initialise({
  "palette": {
    "popup": {
      "background": "#000"
    },
    "button": {
      "background": "#f1d600"
    }
  },
  "position": "top",

onStatusChange: function(status) {
     console.log(this.hasConsented() ?
      'enable cookies' : 'disable cookies');
     if (this.hasConsented())
       VineTrack.allowCookies();
     else
       VineTrack.denyCookies();
    },
});
</script>
Using Google Tag Manager
If you are using Google Tag Manager then you can create a tag that will run the Vine script to allow cookies and you need a trigger to fire that tag when the visitor accepts cookies.
One easy way to fire the tag is to send a GTM event to signal that the visitor accepted cookies. For example with Osano you can do this as follows using the Osano Cookie Consent JavaScript API :
Sending GTM event to integrate Vine Cookies with Osano consent dialog
<script>
window.cookieconsent.initialise({
  "palette": {
    "popup": {
      "background": "#000"
    },
    "button": {
      "background": "#f1d600"
    }
  },
  "position": "top",
//Using Osano callback hooks onStatusChange & onInitialise
//to send GTM event
onStatusChange: function(status) {
     console.log(this.hasConsented() ?
      'enable cookies' : 'disable cookies');
     if (this.hasConsented())
       { window.dataLayer = window.dataLayer || [];
     window.dataLayer.push({'event': 'cookie_consent'}); }
     else
       VineTrack.denyCookies();
    },
onInitialise: function(status) {
if (status == 'allow' || status == 'dismiss')
  { window.dataLayer = window.dataLayer || [];
    window.dataLayer.push({'event': 'cookie_consent'}); }
}
});
</script>
Now we need to tell GTM to listen to the 'cookie_consent' event and allow cookies when receiving event.
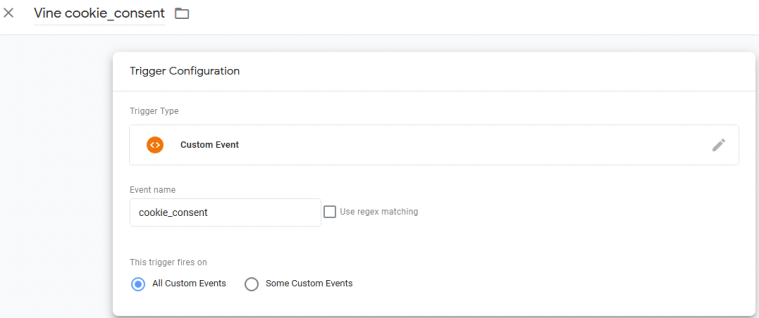
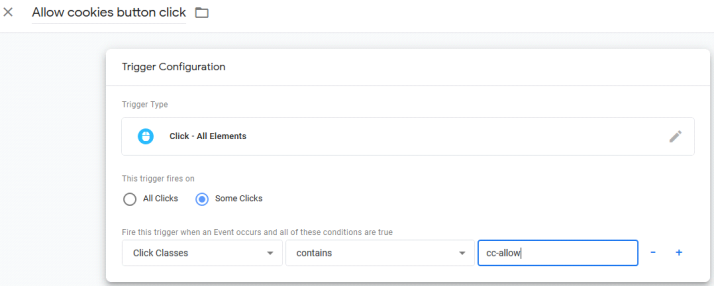
In GTM, create a new trigger as follows:
- Call it “Vine cookie_consent"
- Select Custom Event as the trigger type
- Select the trigger to fire on All Custom Events
- Enter ‘cookie_consent’ as the event name
- Click Save to create the trigger.
Your trigger should look as follows:
Please note that there are other possible types of triggers to be used in GTM. For example, you can use a trigger based on the Accept button click classes (which you can find inspecting the Accept button in the browser)
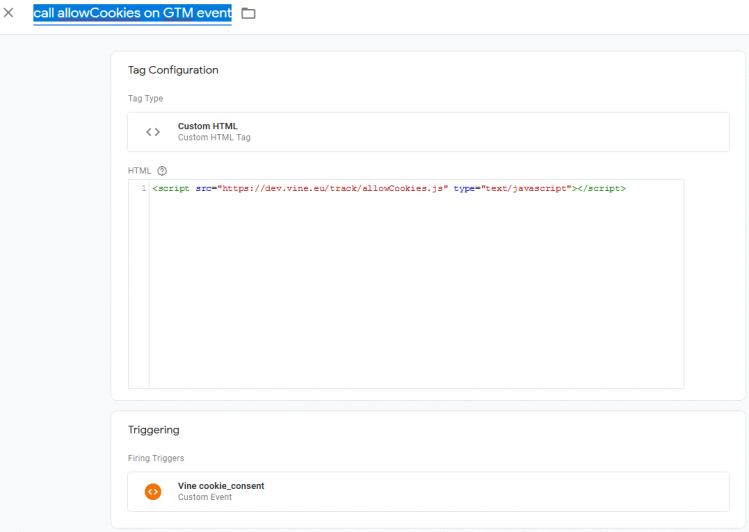
In Google Tag Manager, create a new Custom HTML tag:
- Give it a name: “call allowCookies on GTM event”
- Select Custom HTML as the tag type
- Copy the following script into the HTML box :
- Select the Vine cookie_consent trigger as a firing trigger so this tag fires on receiving the "cookie_consent" event.
- Save and publish in GTM.
GTM Script to allow Vine cookies
<script src="https://vine.eu/track/allowCookies.js" type="text/javascript"></script>Your tag should look as follows:
Using Vine Cookies with Vine Consent Dialog
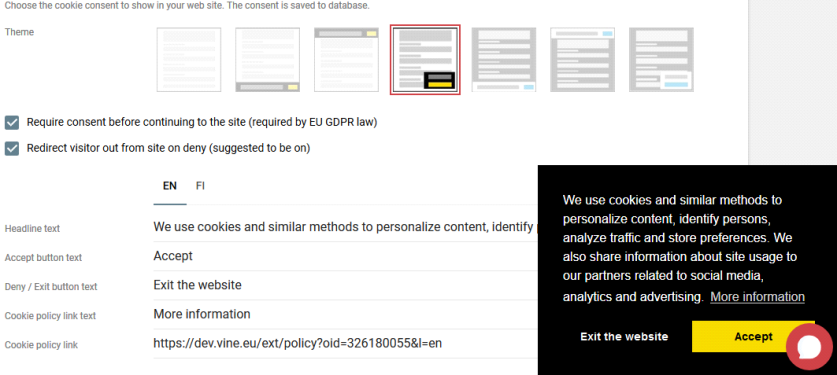
- Select a layout you want to have for your cookie consent dialog:
- (Not recommended). Clear Redirect visitor out from site on deny if you want the visitor to be able to continue with the site even when denying cookies. Please note that in that case it makes sense to change the default text of the "Deny/Exit" button
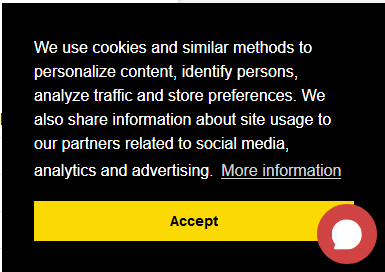
- (Not recommended). Clear Require consent before continuing to the site if you want to enable the site pages regardless if the visitor accepts or not the cookies. Clearing this will remove the "Deny cookies" button:
-
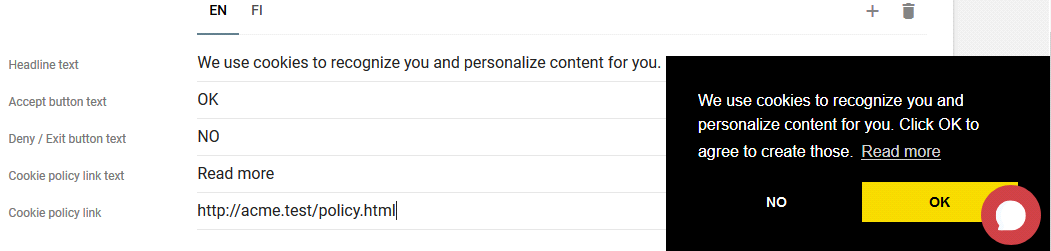
Click the language tab to change settings for that language. To add a langauge, click the plus and enter the HTML "lang" attribute of the language you want to add. Then change the settings for the selected dialog:
- Edit the Headline text field if you want to change the text in the Cookie Consent notice.
- Edit the Accept button text field to change the name of the button to be clicked to allow cookies.
- Edit the Deny/Exit button text field (if it is available) to change the name of the button to be clicked to deny cookies.
- Edit the Cookie policy link text to change the name of the link which open a page where your cookie and privacy policy is described in more detail
- Edit the Cookie policy link if you want to use your own policy page and not the one suggested and generated by Vine for you:
- Click the Exit or Accept button to close the preview dialog.
Integrating Third Party Tracking Cookies
If you are using not only Vine tracking then to comply with the GDPR law you need to prevent third party tracking scripts to be loaded until the user clicks Accept in Vine consent dialog:
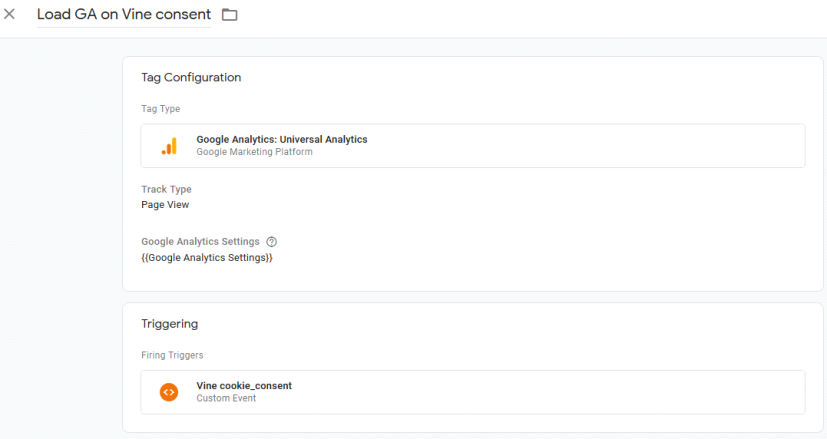
- If you are using Google Tag Manager then you should configure a tag that will load the third party scripts (like Google Analytics) on the
cookie_consentevent that is sent by Vine when the user clicks Accept. - Give it a name: “Load GA on Vine consent”
- Select Google Analytics: Universal Analytics as the tag type.
- Select, for example, Page View as the Track Type.
- Select or create a new Google Analytics Settings Variable.
- Click Triggering and select "Vine cookie_consent" as a trigger that will make the tag fire.
- Save and publish in GTM.
- If you are not using Google Tag Manager, then you need to create a function that will be called after the visitor clicks Accept in Vine Consent Dialog (and after a page loads with cookies accepted). This function has to be passed to VineCookieConsentHandlers as follows:
For example, here is how you can load GA tracking when the visitor clicks Accept:
In Google Tag Manager, create a new tag:
Your tag should look as follows:
Integrating 3rd Party Tracking with Vine Consent
<script >

function VineConsentGiven(){
//do what is needed after user accepted cookies in Vine Consent dialog

  console.log( 'cookie consent given' );

return;
}

</script>

<script>

    window.VineCookieConsentHandlers = window.VineCookieConsentHandlers || [];
    window.VineCookieConsentHandlers.push( VineConsentGiven );

</script>
Vine Cookies & Conditional Content using GTM
Often you'd want to allow some content only in a subset of your web pages and only after the visitor accepts cookies.
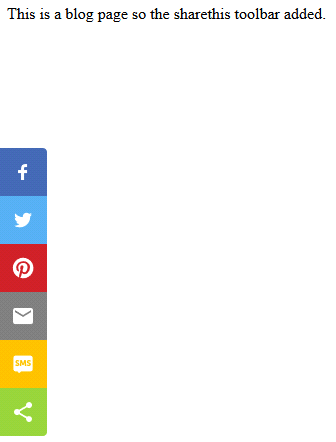
For example, let's say you want to add the toolbar with sticky share buttons provided by sharethis.com only to blog pages of your site and only if the visitor has already accepted cookies.
To achieve this, you will need a new GTM tag that will load the toolbar only when the following two conditions are true at the same time :
- The visitor accepted Vine cookies. That means that the Vine cookie_consent trigger has already fired.
- The visitor is in a blog page. For this we will need a new Blog Trigger that will fire when a blog page is opened.
Here is how you can do this:
-
To "mark" all pages where you want the toolbar to appear, you can add the following script to all blog pages so that they send a "blog" GTM event when opened:
- Create a GTM "Blog" trigger as follows.
- To verify that both triggers fired, create a GTM group trigger as follows:
- Create a GTM tag as follows using the script provided by sharethis.com
Sending GTM Event for Subset of Pages
<script>
 window.dataLayer = window.dataLayer || [];
    window.dataLayer.push({'event': 'blog'});
</script>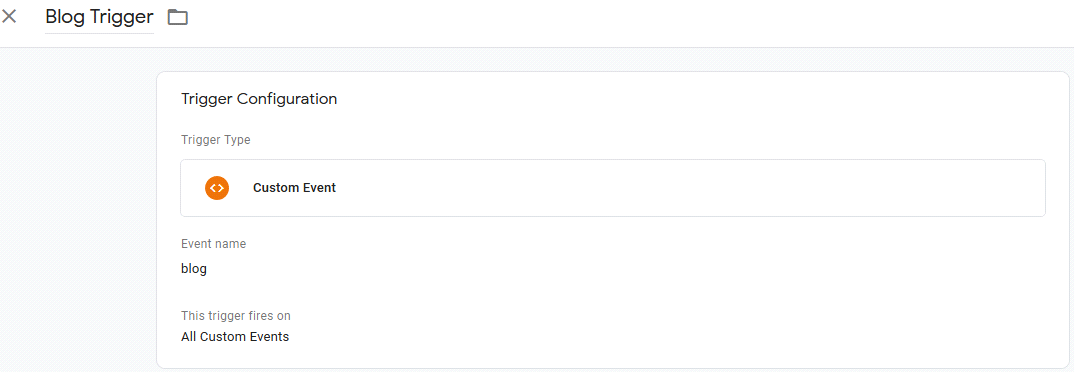
It will fire when the visitor opens a blog page which sends the "blog" event:
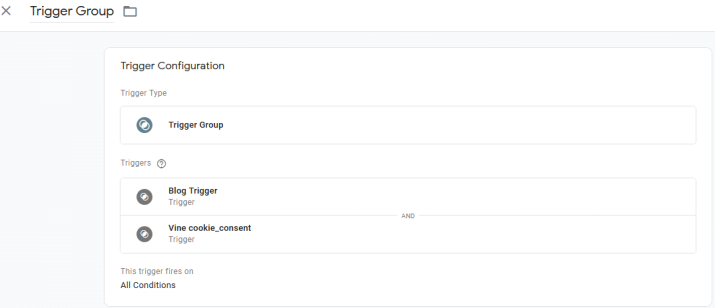
This group trigger will fire only after both included triggers have fired.
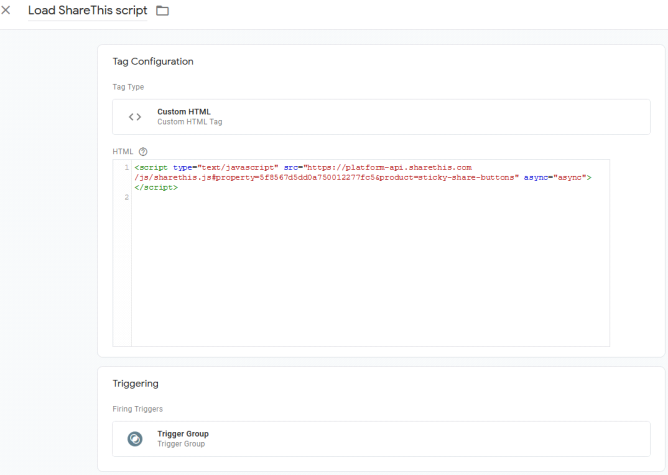
This tag will load the ShareThis toolbar only when both triggers have fired which means that the visitor has already accepted cookies and opened a blog page:
Test cookies
Use the Test cookies tool to check cookies on any site for GDPR compliance. If the tool reports cookies set without user permission then you need to verify if those are marketing tracking cookies, which are not allowed; or if they are cookies required for the web site operation, which are acceptable.

Email Tab
Configuring Email Domain
You can use the Email domain pane in the Email tab of Settings to verify the required configuration of your domain where you intend to send your emails from.
To configure a domain you want to send emails from:
Note: By default, you can send emails only from one domain. Please contact Vine support if you want to add more domains.
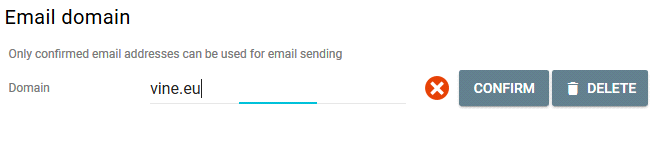
- Enter the domain in the Domain field and click Confirm.
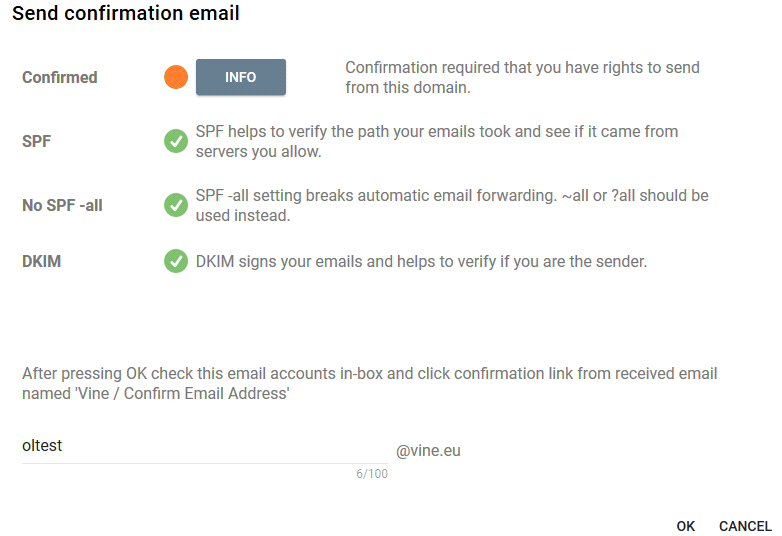
- In the Send confirmation email dialog enter the name of a mail box in this domain which you own.
- Click OK and go to the email box you just entered where you should find the following email:
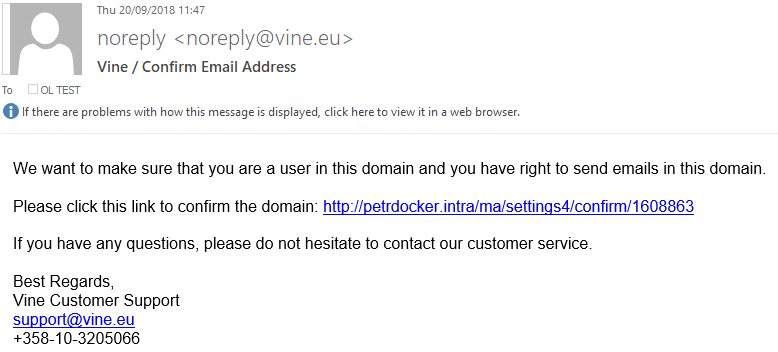
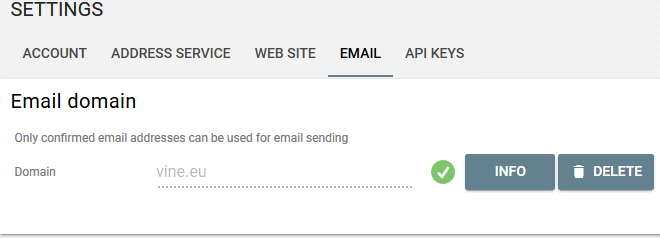
- Click the link in the email. You should see the following page open in your browser:
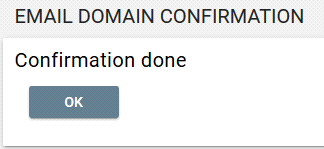
That means that your domain has been confirmed and you can now send emails from it. Click OK.
Please note that if anything goes wrong during confirmation you should click Cancel Confirmation and contact Vine support.
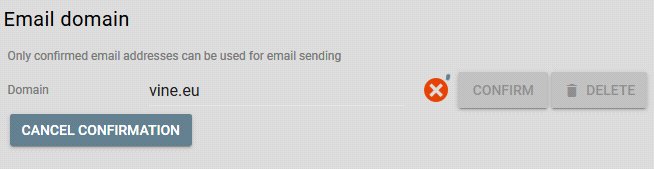
Replacing Configured Domain
If you want to replace the current domain with another one please click  to remove the confirmed domain first and then configure a new one.
About SPF, DKIM and DMARC Settings
Your emails should pass both the SPF and DKIM tests, as many email servers check SPF and DKIM values to decide if they can trust your emails or not. That is why Vine does not allow sending emails with improperly set or absent SPF and DKIM values.
Note: If your domain is confirmed but you have no valid SPF and DKIM values then Vine will send your emails on behalf of you. Your recipients will receive emails from "noreply@vine.eu on behalf of <your address>"
- A proper SPF (Sender Policy Framework) record prevents someone else sending an email as if it is sent by you. Basically, SPF lists internet addresses (IP addresses) which you allow to send emails from you (your domain). When using Vine MA you need to allow Vine servers to send emails from your name. You do not need to know the IP addresses of Vine email servers, we have prepared a reference which includes all the needed data and you just need to add this reference include: spf.protection.vine.eu to the SPF record in the zone file of your domain. If you do not yet have an SPF record there you need to create one.
Please ask your domain administrator to insert the include: spf.protection.vine.eu reference. For example like this : - DKIM (Domain Keys Identified Mail) signature is used to sign your email so that a receiving email server could verify that the email is from you. Vine will sign your emails for your domain but the DKIM signature will be valid only if you explicitly trust the Vine key to be valid for your domain. For this you need to add the following reference to your domain's zone file:
- DMARC (Domain-based Message Authentication, Reporting and Conformance) is a DNS record that helps email receiving servers to, first, verify emails that appear to come from your domain and then decide what to do with the ones failing the checks. To make sure your emails pass a DMARC check, you need to have valid SPF & DKIM records and to have the branded domains set up properly.
DMARC is currently a recommended setting that will improve your spam score for receiving servers, especially the big ones as Microsoft and Google whose Office 365 and Gmail services have already announced that they will verify DMARC records. We recommend to start from a simple DMARC record such as
with "~all" here you are basically saying that most emails from you will come from the listed servers, but some valid emails can come from other servers. This is especially important, if your email campaigns target companies who use email forwarding services.
Note: That is why we strongly recommend to never use "-all" if you want your email campaigns to reach most of your targets.
Your need to replace "your.domain." with your own domain address.
DMARC Record
v=DMARC1; p=none; rua=mailto:dmarc@yourdomain.com; ruf=mailto:dmarc-forensic@yourdomain.comSo that you can carefully monitor and investigate reports to decide on the best DMARC policy for you.
Branded Email Links and Bounce Addresses
To improve the spam rating of your emails even further, you can configure subdomains of your confirmed domain to change Vine associated links to those associated with your brand.
For example, a link “https://VINE.EU/ext/event?...” can be replaced with “https://LINK.ACME.TEST/ext/event?...”
- First you need to choose a domain which you want to use in email links and bounce address. Only confirmed domains can be used for this.
-
Enter a subdomain to be used for branded bounce address and then add a corresponding DNS CNAME entry to the zone file of the selected domain.

-
Enter a subdomain to be used for branded links in emails and then add a corresponding DNS CNAME entry to the zone file of the selected domain.

Please select a domain from the following list of confirmed ones:

For example, if you enter "sender" as a subdomain for the bounce address then the help prompt will show that you need to add the following CNAME record:
After you have added such a record you should click Verify. If the setting is valid to be used for replaced bounce address then a green mark will appear next to the domain address:

For example, if you enter "links" as a subdomain for the branded email links then the help prompt will show that you need to add the following CNAME record:
After you have added such a record you should click Verify. If the setting is valid to be used for replaced email links then a green mark will appear next to the domain address:

Email Address
Using the Email Address set of settings you can configure email addresses you use while sending marketing emails:
- Your vine email. This is the email address Vine has created for your company and will use it to process replies to emails you send. Normally, you should create your own Reply address for your emails instead of this automatically generated one. You can create your own mailbox anywhere with the name you like and configure it to forward emails to Your vine email. Then Vine will be able to read responses and collect reply statistics and out-of-office data.
- Forwarding email address. This is where you should enter the email address you have configured to be used as Reply address for your emails. Click TEST EMAIL FORWARDING to verify that forwarding to Your Vine email has been configured correctly. Please note that the test might take a few minutes. You will see a green check mark if the test passes.
Please note that this address is included in a list of email addresses suggested to you when choosing a Sender or Reply address for an email. - Invite Friend email address This is the From address you would like to use in Invite Friend emails. Click TEST INVITE FRIEND EMAIL to verify if a sample Invite Friend email you will receive has the From address you would like your emails to have.
Email Templates
The Email Templates tool allows creating new email templates and converting old ones.
To open the tool, click Templates.
Discount Codes
In this pane, you can import discount codes from an Excel file and then insert those in Emails you send to your customers. Each code will be used in only one email.
To import discount codes to a new group:
- Click New Group.
- Enter the name of the group. (Spaces are not allowed in the name.)
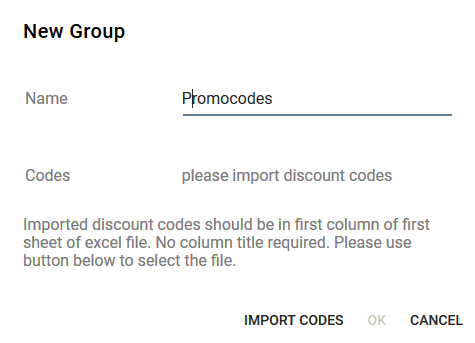
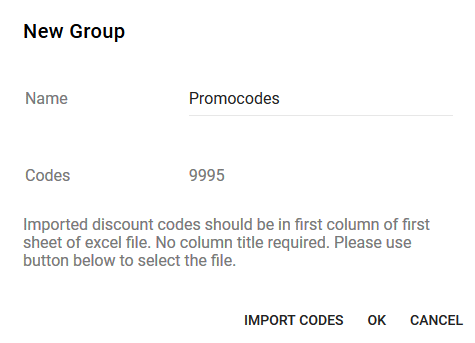
- Click Import Codes and then select an Excel file with those. Your codes will be imported and the number of imported ones will be shown.
- Click OK to save the group. If you want to discard the imported group then click Cancel
To add codes to an existing group click, click  and then select Import (Append) codes. After that select an Excel file to add codes from it.
To delete a group, click and then select Delete Group.
API Keys
You can create API keys in the API Keys tab in Settings. API keys can be used to log in to Vine services without using Vine username and password. API keys are more secure to be used in external services because:
- There is no need to store your password with an external service and you can simply delete an API key and remove access to Vine for that service.
- API keys stay functional even if you have to change your Vine password.
- API keys can limit access to functionality only required by that service.
To create an API key click New Key.
- Enter a name and a description for your key.
- From the Rights list select access rights for your key. Currently, Vine API keys support access to Vine REST and Vine Zapier integration.
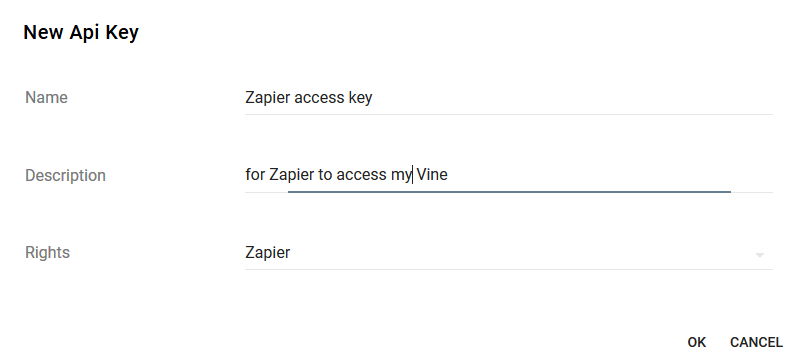
- Click OK. Your key will be created.
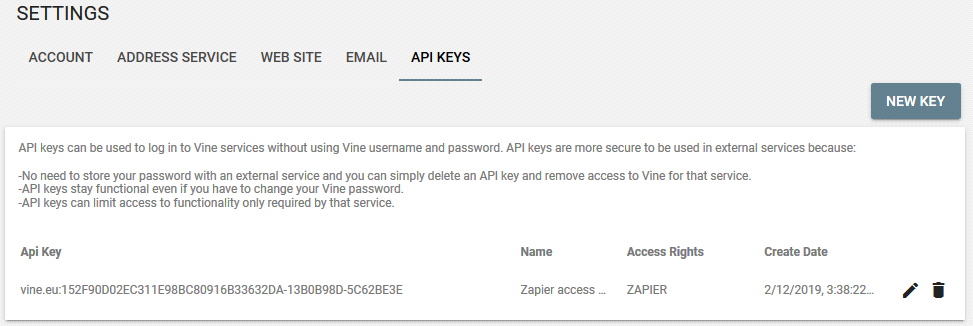
Now you can copy and paste the key to give other services access to your Vine.
You can find more information about using API keys in Zapier Integration.
Admin Panel
Use the Admin Panel to manage Vine users in your company. This panel is visible only to users with the Admin role.
Creating a New User
- Click New User.
- Enter the user's email which will also serve as a Vine login.
- Enter the user's first name, last name, and phone. All fields are mandatory.
- Select roles for the new user depending on which Vine applications the new user will work with.
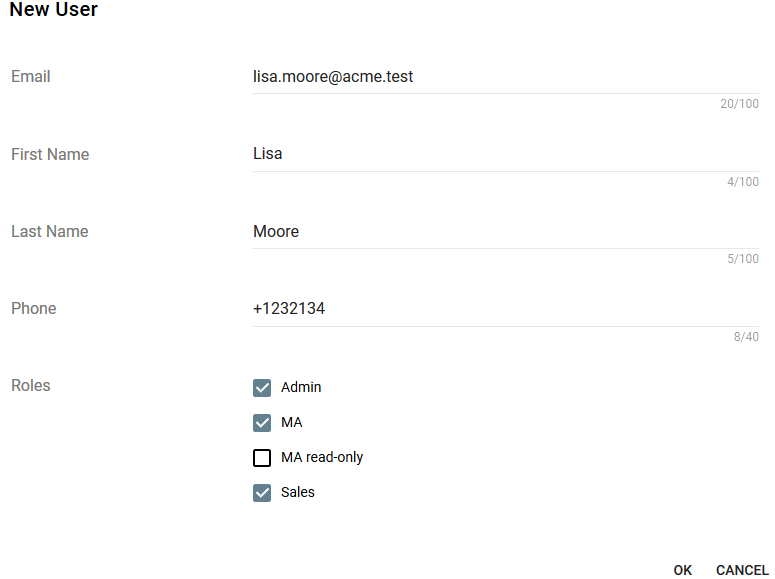
- Click OK. Vine will first check if there is an existing person with the same email address. If "no" then Vine will create the new person right away. If "yes", then it will ask if you want to associate the new user with that existing person:
Select MA read-only to create a user who can login and browse through MA pages but who cannot change anything. (Use this to give people access to see all data and statistics without worrying about them breaking anything.)

You can click Use Existing to associate the new user with the existing person, click Create New to create a new person for the user, or click Close to cancel creation of the user.
Editing a User
To edit a user, simply click it to open its edit form. (Or click and then select Edit User from the menu that will open)
Deleting a User
To delete a user, click and then select Delete User from the menu that will open.
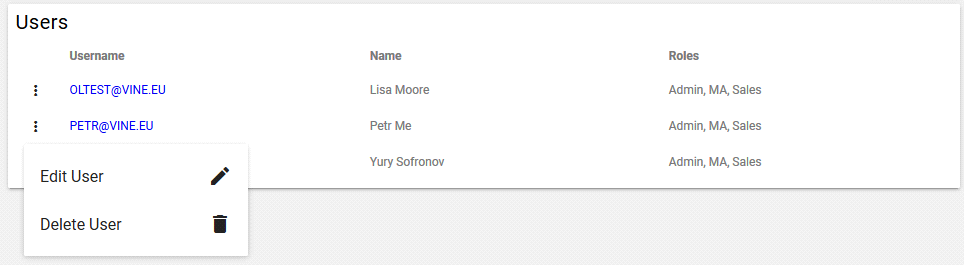
When you delete a user, the associated person is not removed from your Vine database.
Chatbot Tab
Setting Chatbot Visibility
Click the Chatbot Enabled switch to turn the chatbot on.

You also need to add the Vine tracking script to all web pages where you want your chatbot to appear. You can find the script in Settings->Web Site->Tracking pane.
Additionally, you can limit the pages where the chatbot will show up by using the Chatbot Visibility setting:

- Select Show in all pages if you want the chatbot to appear in all pages (where the tracking script is present).
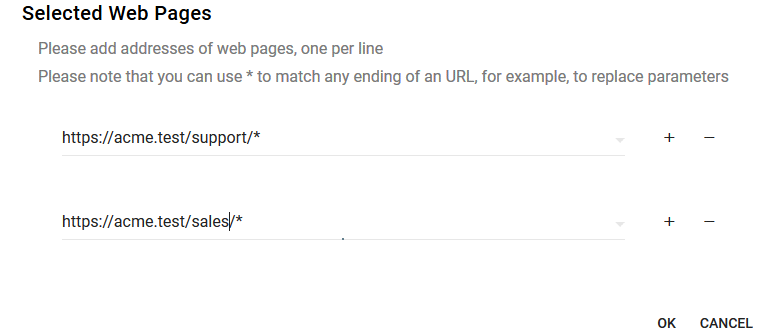
- Select Show only in if you want the chatbot to appear only in specific pages. Click Pages to add these pages:
- Select Hide only in if you want the chatbot to be hidden only in specific pages. Click Pages to add these pages.
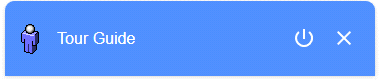
Setting Chatbot Styles
- Select the Avatar and Header images for the bot:
- If you want to load custom image then scroll the list to the bottom and select More... . It is recommended to use 40x40 px PNG images.

Click in the header to choose and set its background color:

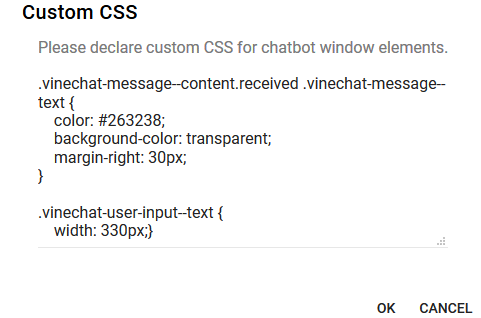
Click Custom CSS if you want to add custom CSS controlling the look of chatbot dialog elements:
Chatbot Languages
In this section, you can add more languages and choose the default language.
Setting Chatbot Language
Select the language of your chatbot from the Default Language list:

Please note that you should use the HTML lang attribute to set the chatbot language in an HTML page, if possible:
If the lang attribute is not present in an HTML page then the default chatbot language is used.
Adding a Language
Click the plus to add a language to the chatbot. In the following dialog, you should enter the HTML "lang" attribute of the language you want to add:
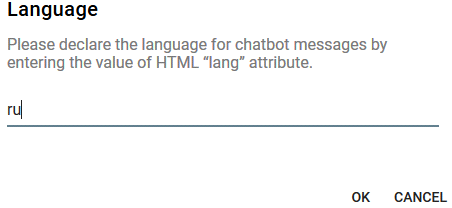
Click OK and the RU tab will be added where you can edit the default English texts:
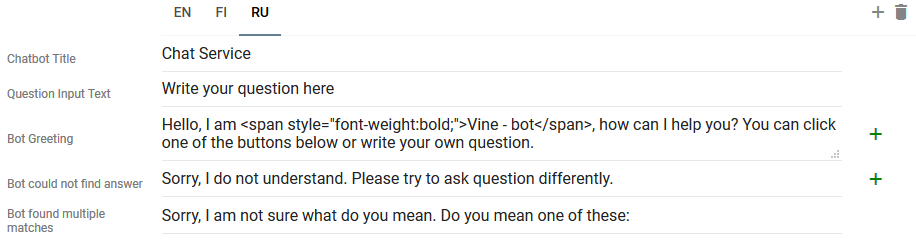
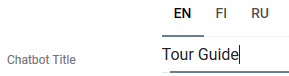
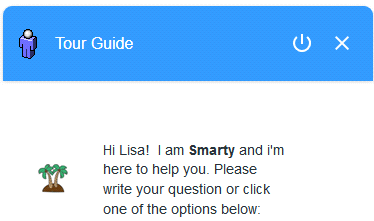
Chatbot Title
Question Input Text
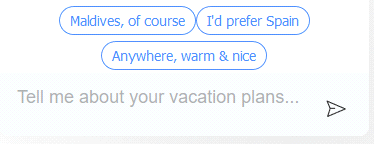
Use Question Input Text to set a placeholder text shown where the user will type questions. Use it to encourage the user to type here.


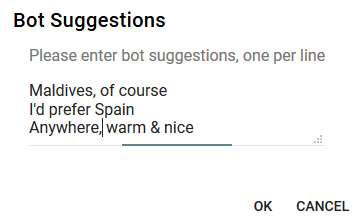
Bot Greetings
Use the Bot Greeting and Bot Greeting for Identified fields to set the texts which the chatbot starts conversations with unknown and identified visitors, respectively. You can use the ${firstname} tag to be replaced with the name of the identified person.

Click  to the right of the greeting box to add chatbot suggested questions:
Drag  to enlarge the dialog as needed.
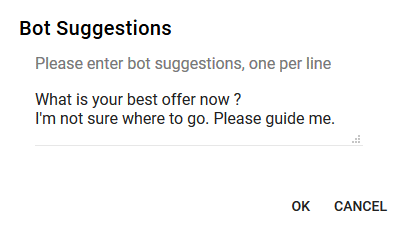
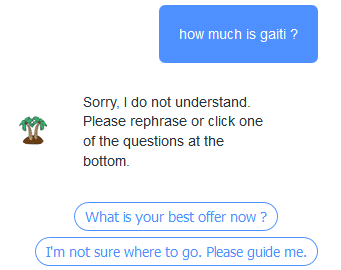
Bot Сould Not Find Answer
Use the Bot Сould Not Find Answer field to enter the answer that the bot will show when it does not find a good enough answer.

Click to add chatbot suggested questions:
Bot Found Possible Matches
Use the Bot Found Possible Matches field to enter the answer that the bot will show when it finds one or more not-so-good answers.
Live Chat Settings
In the Chat transfer to human section you can configure the chat bot so that a visitor can switch to a human operator who can then have a live chat using your team messaging application. You need to have the Admin role to configure Vine Live Chat.
First, please select your team messaging application from the Chat type list. More settings will appear depending on your application.
Mattermost Configuration
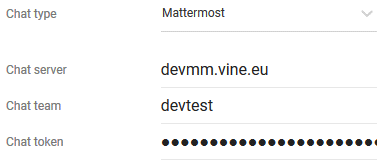
For the Mattermost application the following settings will appear:
Here:
- Chat server is the web address of your Mattermost server.
- Chat team is a team in Mattermost where a channel will be created for each new conversation request. (If you do not have an appropriate team then you need to create it in Mattermost.)
To integrate your Mattermost with Vine chat please use a Mattermost account with the administrator rights to do the following:
In Mattermost, please go to System Console > Integrations > Bot Accounts and set Enable Bot Account Creation to true:
Go to Main Menu > Integrations > Bot Accountsand click Add Bot Accountto create a bot account that will be used in integration.
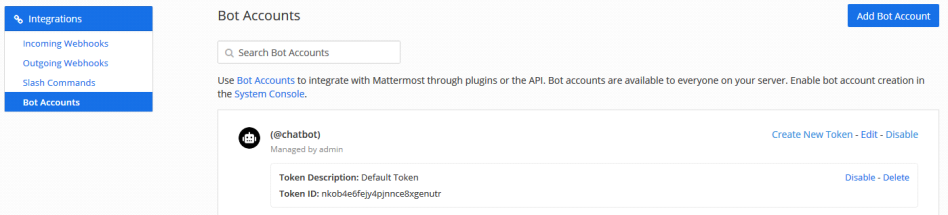
- Copy the Token ID and paste it in the Chat Token field.
Microsoft Teams Configuration
For Microsoft Teams the following settings will appear:
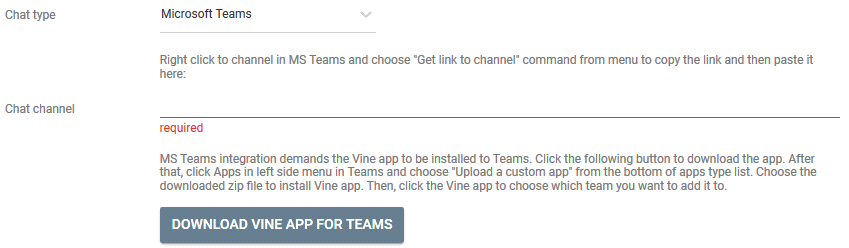
To integrate your MS Teams chat channel with Vine chat please use a MS Teams account with the administrator rights:
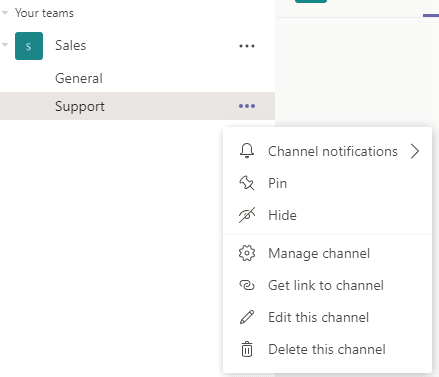
- In MS Teams, right-click the channel and select Get link to channel:
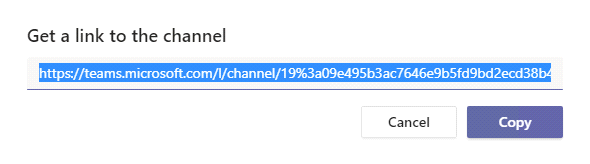
- Copy the link
- and paste it in Vine to the Chat channel field
- Now click Download Vine App for Teams to download and save "Vine app for Teams.zip" file.
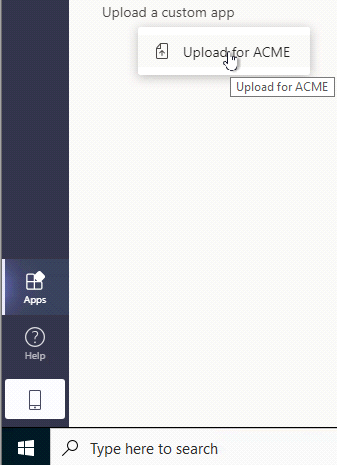
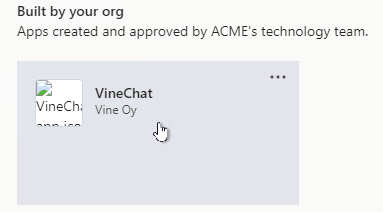
- In MS Teams, click Apps in the bottom of the left side menu and then clickUpload a custom app and select Upload for your organization.
- Click the Vine app to choose which team you want to add it to.
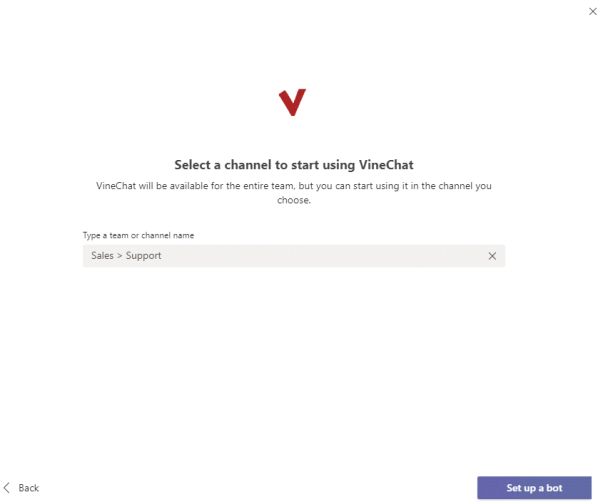
- Click Add To a Team
- And then select a channel and click Set up a bot:

Browse for the downloaded zip file "Vine app for Teams.zip" to install Vine app.

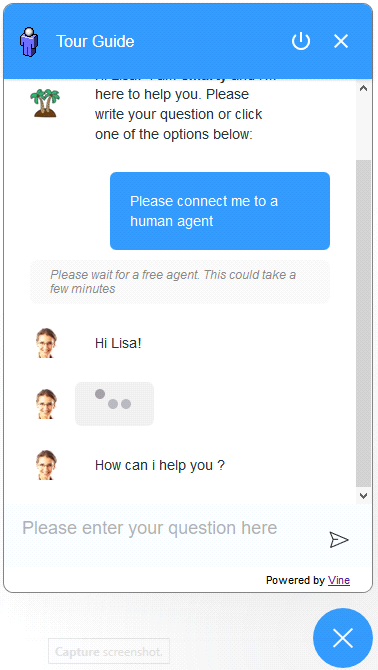
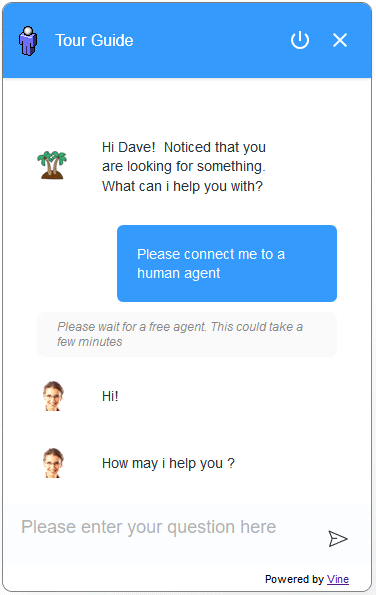
You have now finished integration of Vine Chatbot and MS Teams. Please verify this by starting a chatbot (for example, in chatbot preview) and then enter the "Switching to operator trigger" phrase from the settings:
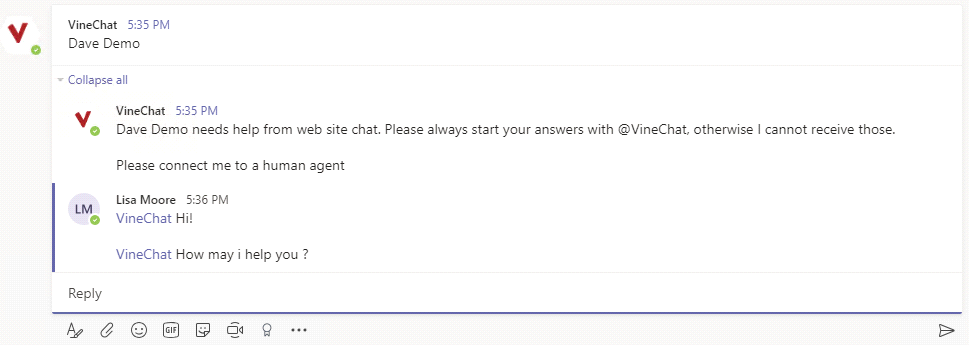
If everything has been configured correctly then you should get a prompt for a new conversation in MS Teams:
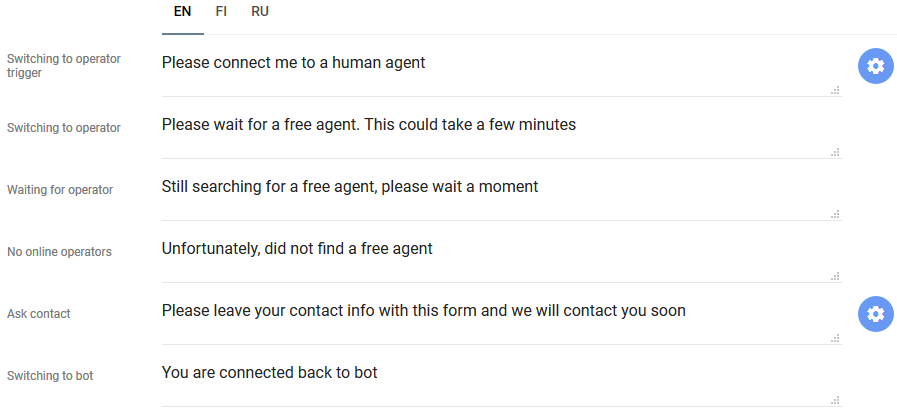
Live Chat Trigger & Messages
Use the following settings to configure chatbot messages in Live Chat:
- Switching to operator trigger. Visitor questions will be compared to this phrase to detect when the visitor asks for a human agent. Click to add more Live Chat trigger phrases.
- Switching to operator. This phrase shown after the chatbot detected the switching to operator trigger.
- Waiting for operator. Shown while chatbot is waiting for a human agent to respond. Can be shown several times till an agent responds or the chatbot cancels waiting (after about 3-4 minutes of waiting).
- No online operators. Shown when the chatbot stops waiting for a human agent.
- Ask contact. Shown after chatbot stopped waiting. Click and select a form that will be shown so that the visitor could leave its contact data using this form.