Emails
Use the Emails tool to send mass emails and analyze the results.
Creating and Sending Emails
On the Emails tab you can go step by step from creating to sending an email: First you will be able to select an existing email or create a totally new one, then select email recipients, and finally send the email to all members of your target group.
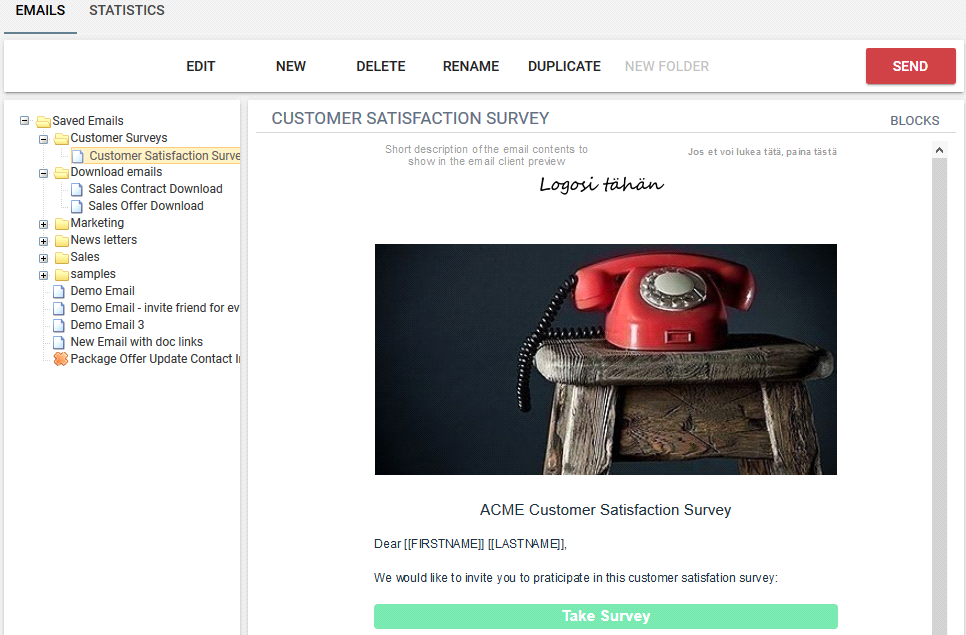
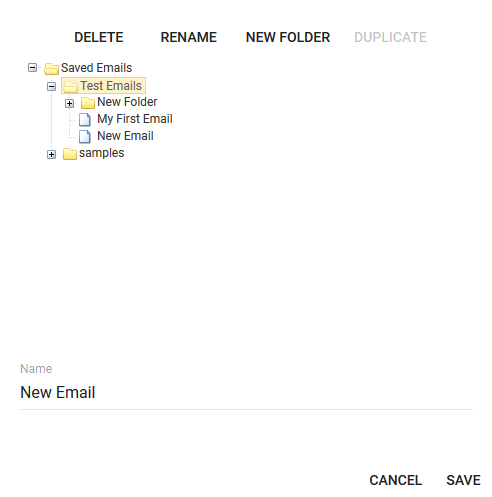
The first Emails page lists all existing, previously saved emails in the Saved Emails folder:
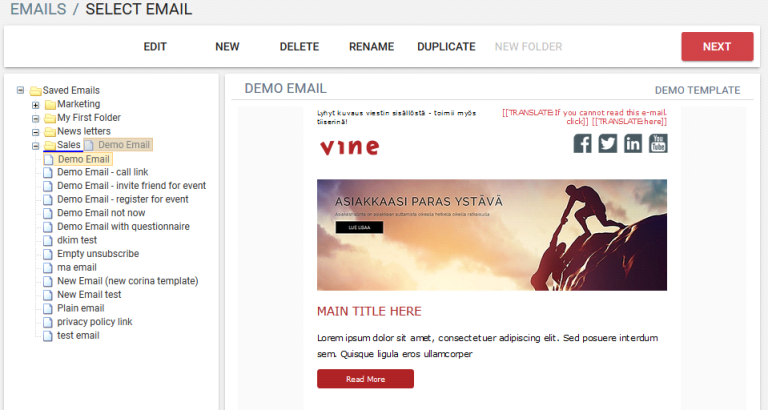
Select an email on the left and click  to go to the Recipients page if you want to send the selected email. Otherwise, click
- Edit if you want to modify the selected email.
- New if you want to create a new email.
- Delete if you want to remove the selected email from the database.
- Rename if you want to change the name of the selected email.
- Duplicate if you want to create a copy of the selected email.
Emails with a cross icon  are emails which have not been tested since they were last changed. You have to test emails before you can proceed to the Send page.
To arrange emails better you can add or change email folders:
- To create a sub-folder in a folder: select the folder and click NEW FOLDER. A sub-folder with the name "New folder" will be created.
- To rename a folder: select it, click RENAME and type in a new name.
- To delete a folder: select it and click DELETE. The folder will be removed.
Please note that you can drag emails and folders between folders. You have to drop an email (or folder) on a folder's name where you want to move it:
Creating New Emails
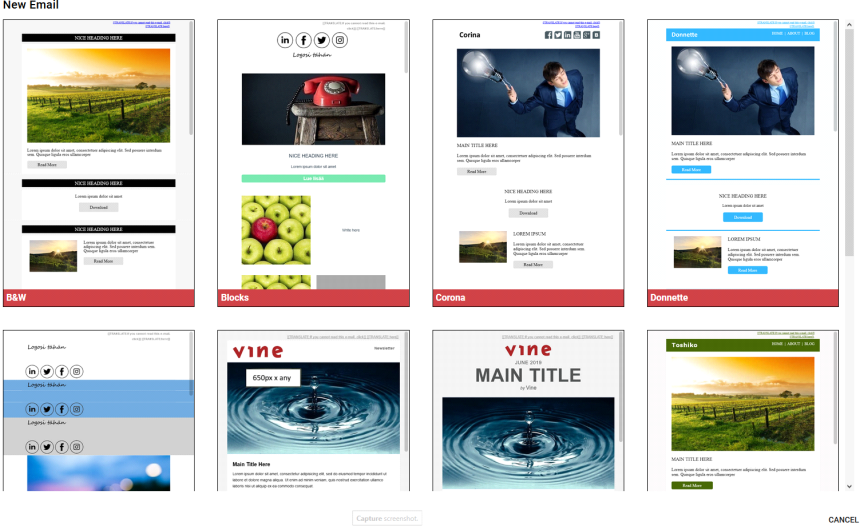
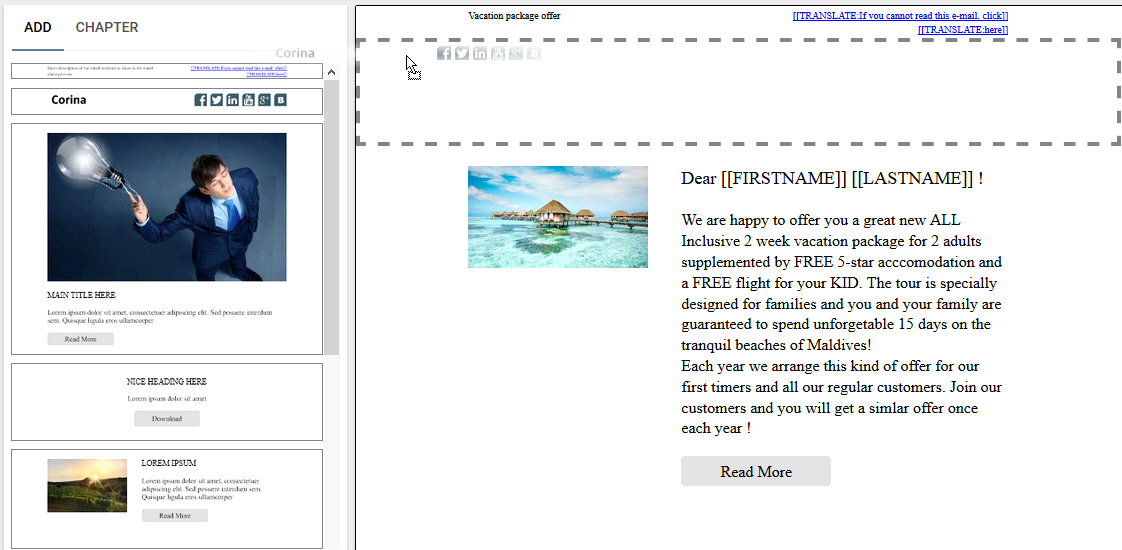
On the Emails page click NEW if you want to create a new email. The New Email page will appear:
Click an email template to select it.
Click  to choose the currently shown template and go to the Edit page:
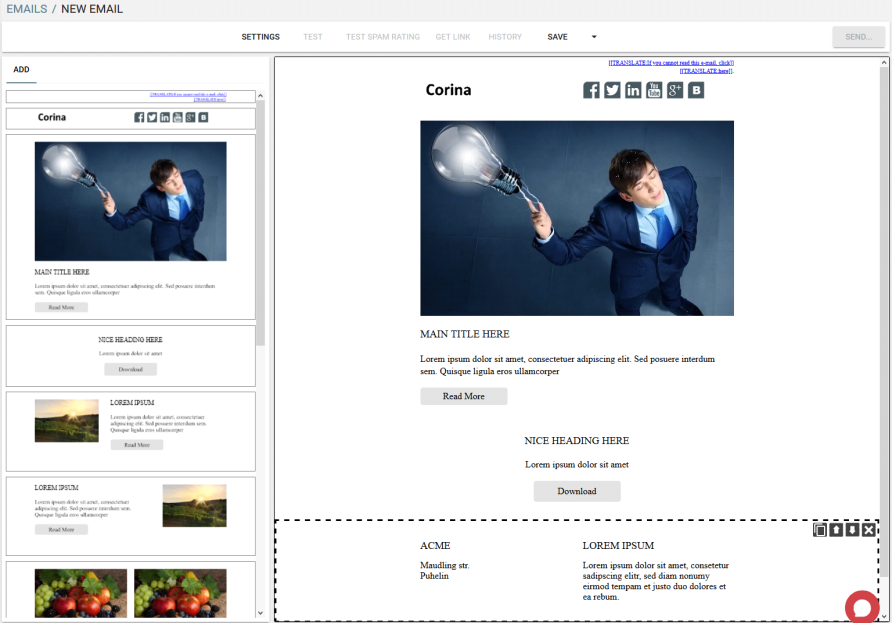
On the Edit page you can design your email and configure its settings. Please refer to the Editing Emails chapter for detailed information about editing emails.
Saving Emails
While working with an email on the Edit page, it is recommended to periodically save your changes.
- Click SAVE and then select Save to instantly save the current email or Save As if you want to save it with a new name.
- If you have selected Save As then a dialog will appear where you can select a folder or create a new one:
- Type a name of your email.
- Click SAVE.
Testing Emails
You have to test the spam score of your emails on the EDIT page to continue to the next step. Please click EDIT, then TEST and SAVE the email to continue.
- Click TEST to send the current e-mail to you. Vine will verify the spam score of the email and will show if the SPAM check is passed or not:
- Click Test Spam Rating to evaluate the spam rating of your email and see a list of things that can be improved to get a higher score:
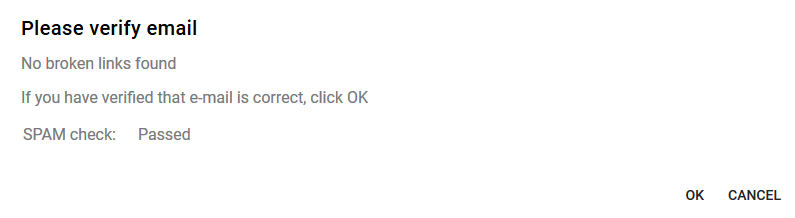
Check the Inbox in your email application and verify the email and that it has correct Subject, Message and From fields.

Adjust the email settings to get as high rating as possible for your email to reach most of recipients. We recommend to get at least 9/10 to reach the maximum number of your recipients.
If you have verified that the e-mail is correct, click to go to the RECIPIENTS page. Note that if you haven't yet saved the email you will be automatically asked to save it now.
Using Email Web Link
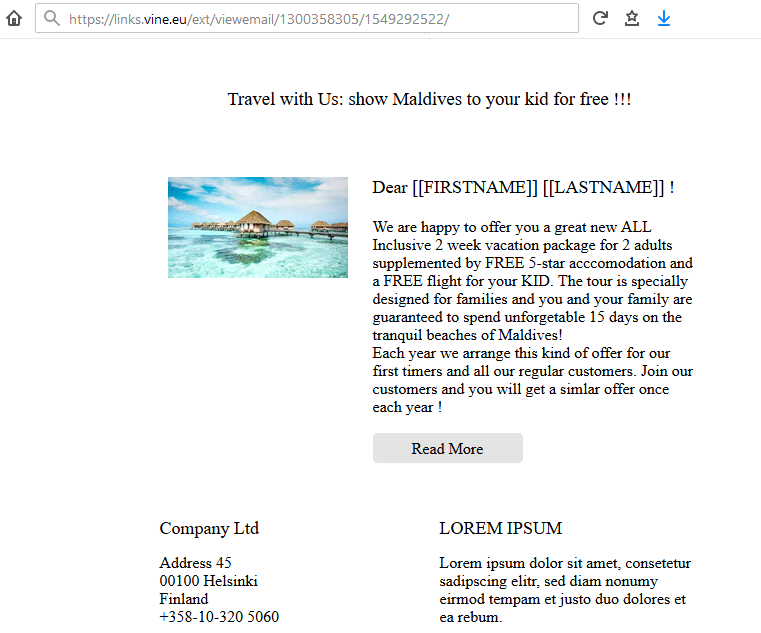
If you want to publish you email online in a web page then you can get its web link using the Get Link command.
If your email is personalized then all personalization data will be removed in the web version of your email. For example, email chapters which include links to a document download, to an event registration, and so on, will be removed as those links are always personalized in MA emails. Field replacement tags, such as [[FIRSTNAME]], [[LASTNAME]] will be shown:
Reverting to Previous Versions
You can revert to any previous version of an email. Click History and then click any previously saved version to revert to it.
The clicked version will be loaded to the editor and you can save it, if it is the one you need.
Editing Emails
To change email settings, click Settings. The following dialog will appear:
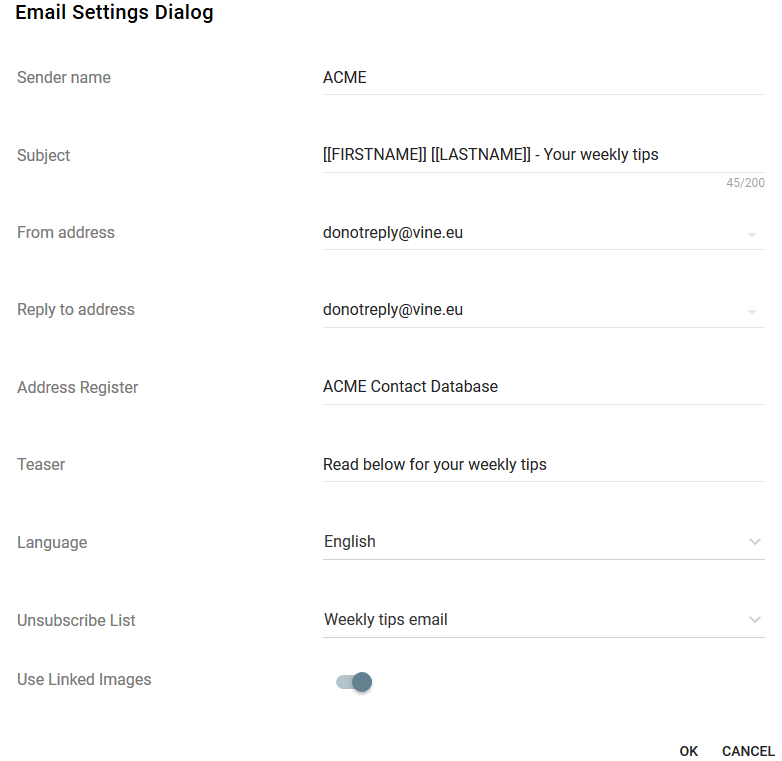
Type in the needed values in the Sender / Subject / From and Reply fields.
For the From address and Reply to address fields you can also select values from the drop-down list. The list includes your email address, the Forwarding email address and can additionally include addresses configured using special Vine system settings.
Please note that you cannot send an email if the domain of its From or Replyaddress has not been confirmed. You can confirm and configure email domains on the Email tab of the MA Settings.
In the Address Register field you can specify the source of target contact data for this email.
Use the Language setting to specify the language for standard email parts, such as, "if you cannot read this email, click here", "unsubscribe". These will be translated automatically. (By default, the language of new emails is set to that of your user interface.)
Select Use Linked Images if you want to include only links to your images and do not embed the images in email. This will reduce email size, and avoid showing images as attachments in some email clients (for example, in Android devices).
You can also set or change most of the Email settings on the final SEND EMAIL page.
Setting Teaser Text
Use the Teaser field to set the text shown by email clients in email preview.

Please note that this teaser text will not be visible in email itself. If you want the teaser to be visible also in the email you need to use the top left teaser field in email template:

Unsubscribing
From the Unsubscribe List in the Settings, select an email list which you want the email recipients to unsubscribe from when they click the Unsubscribe link in this email.
Emails sent using the Marketing Automation tool normally should include an Unsubscribe link. You can add an Unsubscribe link in the Email Editor or it can be already present in your email template. In a template, it can look as follows:

When an email recipient clicks the Unsubscribe link, a special Unsubscribe web page will open asking the recipient to confirm leaving the email list.
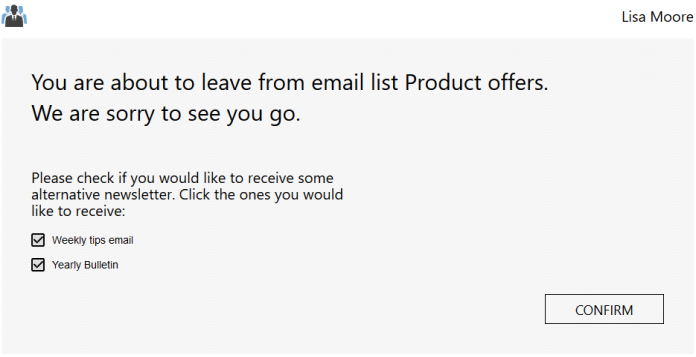
The Unsubscribe page lists all email lists except the ones marked as "hidden".
If all check boxes are cleared on the Unsubscribe page then the email recipient will be added to the "Unsubscribed list".
Organizing Chapters
Adding a Chapter
To add a chapter, simply drag it from a list of chapters on the Add tab to the desired place in your email.
If the Add tab is not open then please first click Add to open it.
Copying a Chapter
Select the chapter you want to make a copy of and click  to insert a copy of the current chapter below it.
Moving a Chapter
Hover over the chapter you want to move, click ![]() and hold, and then drag the chapter to any other location in the email.
and hold, and then drag the chapter to any other location in the email.
Removing a Chapter
Select the chapter you want to remove and click the cross icon  .
.
Editing Chapters
Note: You can modify chapters within the limits set in the Email Templates tool.
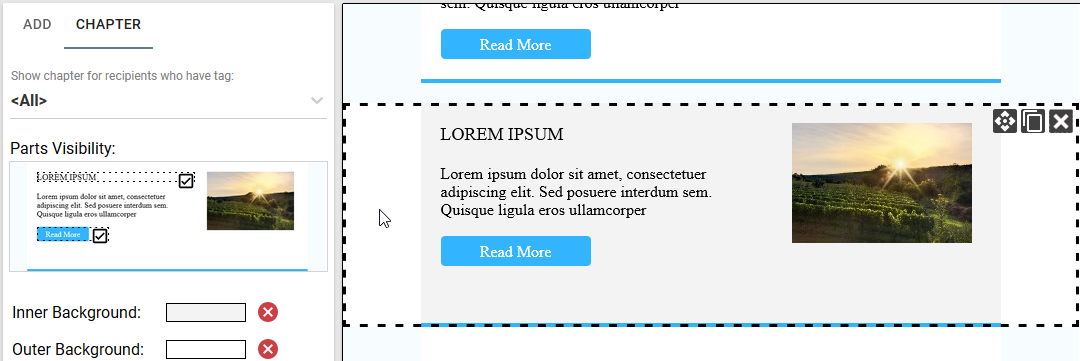
Chapter Settings
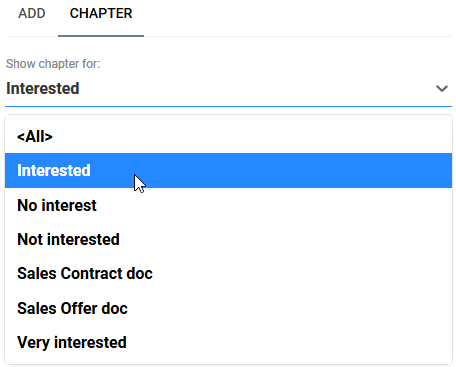
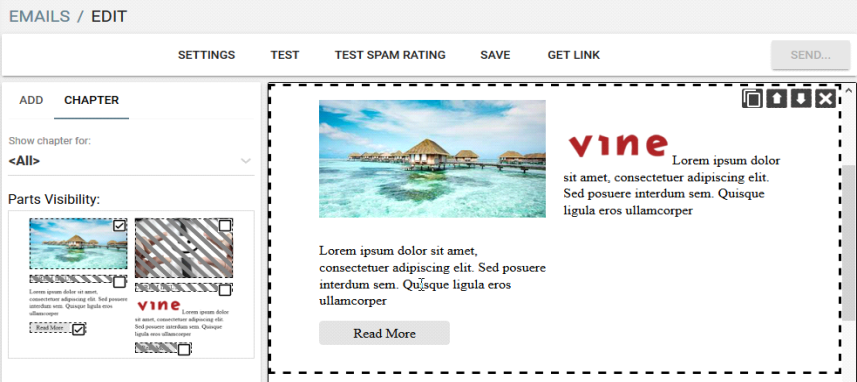
The chapter settings are located on the left on the Chapter tab. Click inside a chapter to open the Chapter tab.
Use the Show chapter for list to make the chapter visible only to persons with a specific tag:
The settings allow you to hide elements of a chapter as well as set the chapter visibility. Simply clear the checkbox of an element if you do not want email recipients to see it.
If a chapter includes an element (e.g. a button) you can hide or enable it by selecting the element (or whole chapter) first and then clearing or selecting the element’s check box, respectively.
If the email template you are using has the Allow to change email colors switch turned on then you can also change the available chapter background colors:
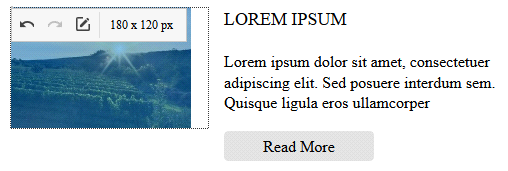
Changing an image
Click an image which you want to change. The toolbar that will appear above the image includes the Undo/Redo buttons, the size of the image set in CSS and the Edit button  .
.
Click to edit the image,
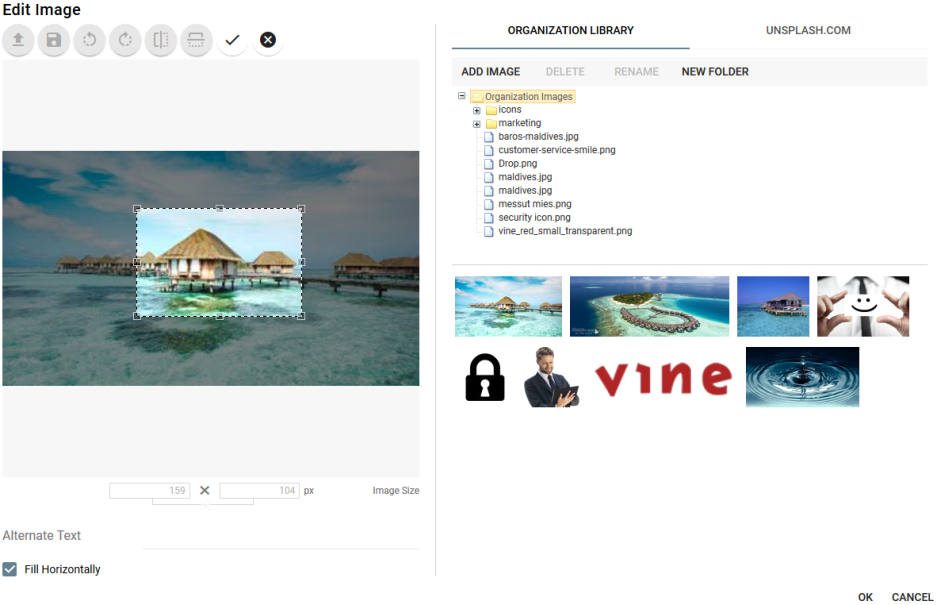
The following Edit Image dialog will appear where you can add a new image:
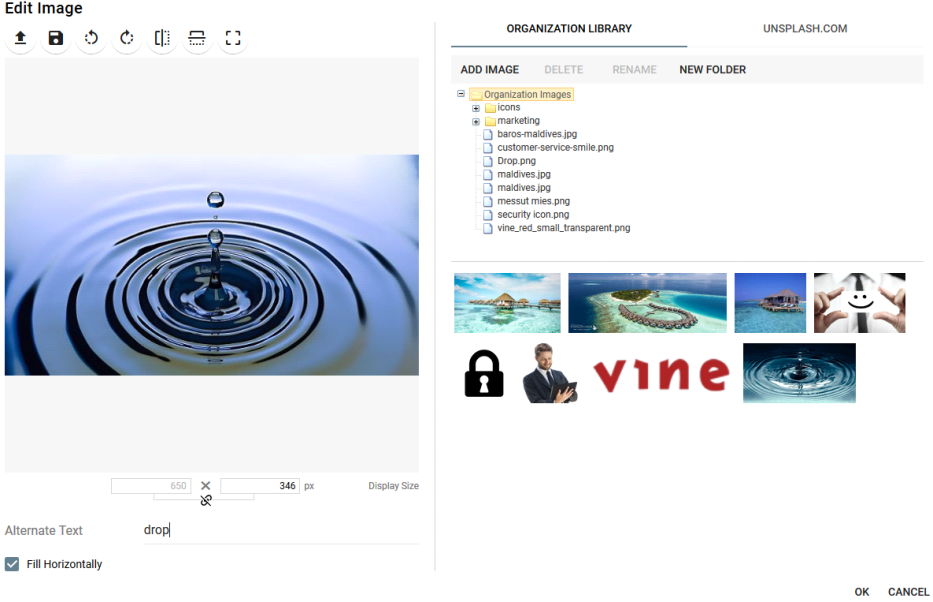
You can click  to find and load an image or you can add an image from the following tabbed pages:
- Organization Library. This tab shows the library of images available in Vine Marketing Automation for all users in your company. You can add more images or remove the ones you no longer need.
- Unsplash.com This is a well known site which provides free photos for everyone. You can search its library or select an image from those that you used recently.
Click an image that you want to add.
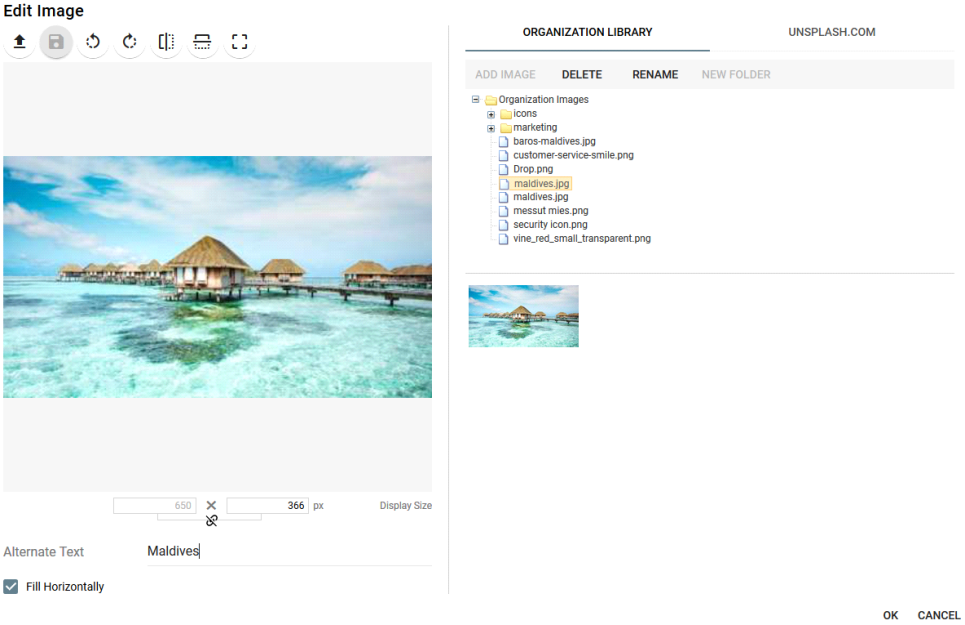
Use the Alt field to set alternative text ( text shown when an image cannot be shown).
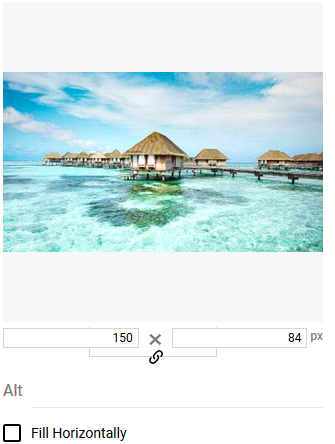
If the image is wider horizontally than the area reserved in the template, then the image will be automatically resized proportionally to fit horizontally.
If the image is smaller horizontally than the area reserved in the template, then the image will not be changed and there will be left empty space horizontally. Please select Fill Horizontally if you want your smaller image to be resized proportionally to fill horizontally the reserved area.
In all cases the height of the reserved area will be adjusted automatically.
All usual image formats are supported: JPG, PNG, GIF
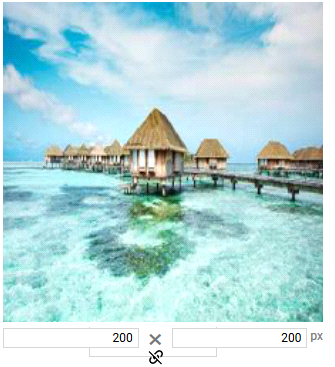
Resizing Image
To change the CSS size settings:
- Clear Fill Horizontally. If this is not cleared then the smaller image will be reset to the available space in the template.
- Change the CSS width or height settings. Please note that when the Keep Image Ratio is locked then there is no reason to increase the CSS width larger than the one set in the template for this area.
- If you want to change the image aspect ratio then, first, please click the Keep Image Ratio icon
 to unlock aspect ratio and then change the width and height settings.
Editing an Image
You can fine tune how your image looks using the toolbar commands.

Hover over a toolbar button to see its tip.
- To browse for a new image click
- To save the image in email to your organization library, click

- To rotate the image click

- To flip the image click

- To crop the image click
 and drag the sizing handles to crop an image to its part.
You can Press-and -hold the Shift key when resizing the crop rectangle to maintain its aspect ratio.
In the crop mode the image is shown based on its real width and the crop rectangle is set to the CSS size set in the template.
Click  to apply changes.
Adding an Image in Text
If you want to add an image inside text, then place the cursor where you want to add a new image and click the Insert/Edit image button in the toolbar:
Editing Links
To configure links, please use the Link tab which shows when you click inside a link in your email:

-
Select a link or a button.
-
The Link tab will display settings for it.
-
Select the needed type of the link:
-
The settings for the selected link type will be shown:
For example, creating a document link :
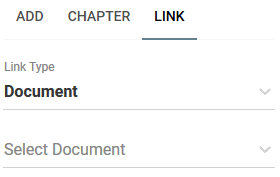
Select a document to complete creating the link:

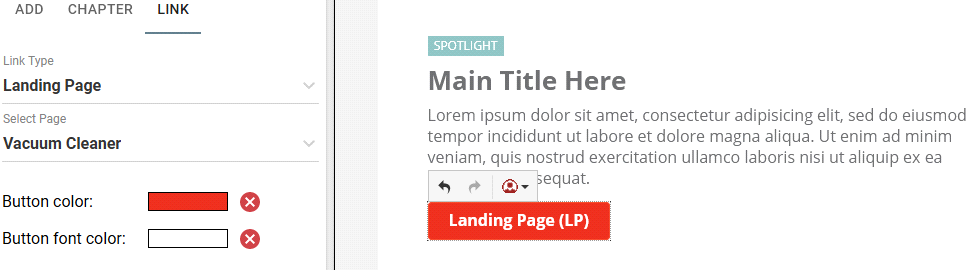
If the email template you are using has the Allow to change email colors switch turned on then you can also change the button colors:
Please note that all links are automatically tracked if the target pages support tracking.
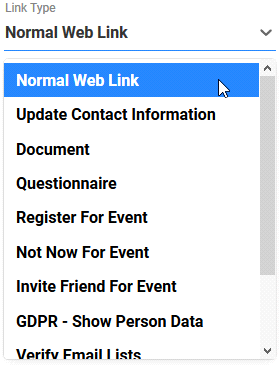
Link Types in Email
The following link types are supported in emails using Customer Web pages.
Added using the Link Type menu:
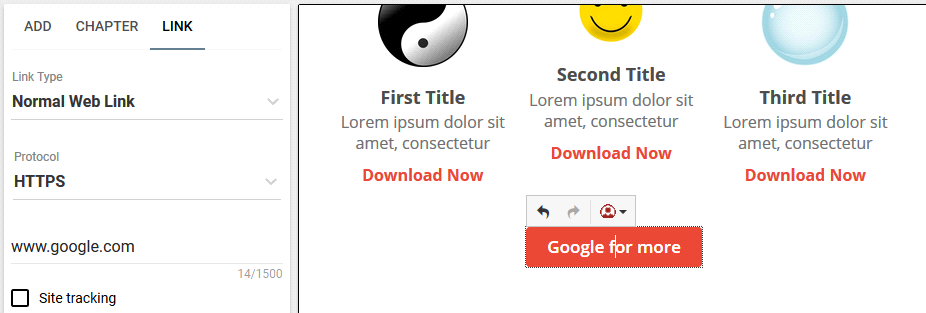
- Normal Web Link. Used to define regular web links.
- Select Site Tracking to track clicking this link by site visitors. If Site Tracking is selected then you can use Google Analytics to isolate and analyze traffic to your web pages coming from Vine marketing emails. The links with Site Tracking selected will
- Use HTTP, HTTPS Protocol for regular web links.
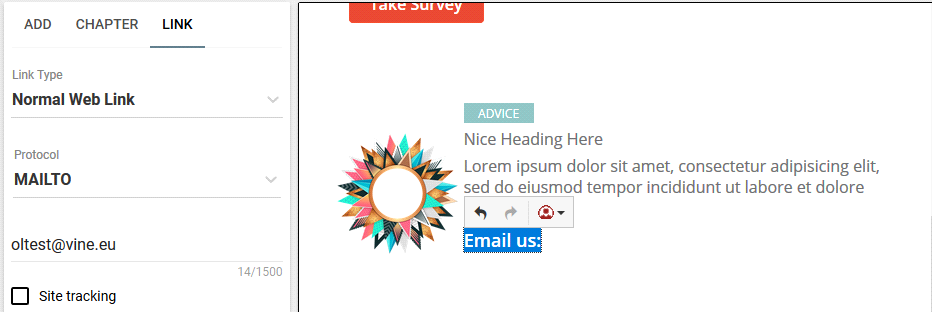
- Select MAILTO to create email links:
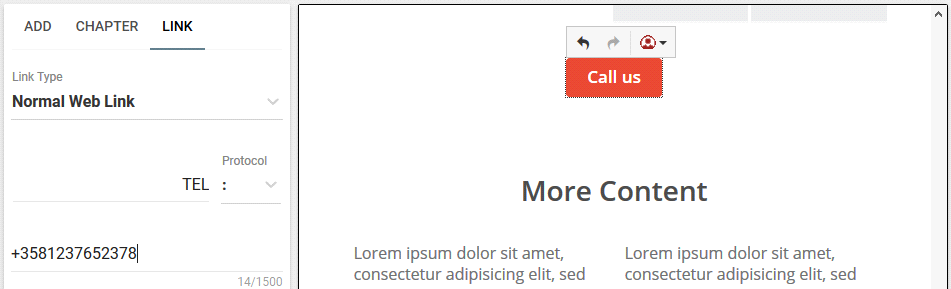
- Use : for custom links.
- Update Contact Information
- Document.Used to download a document from the database.
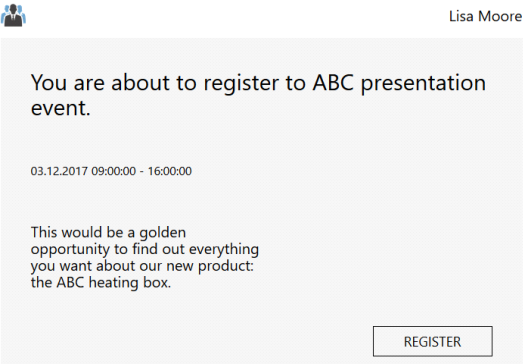
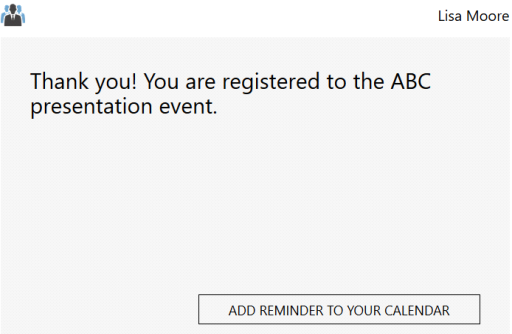
- Register for event. Used to register for events listed on the EVENTS page of the tool. When email recipients click such a link , they get connected to the event and then can add a reminder to their Calendar (for example, Outlook Calendar).
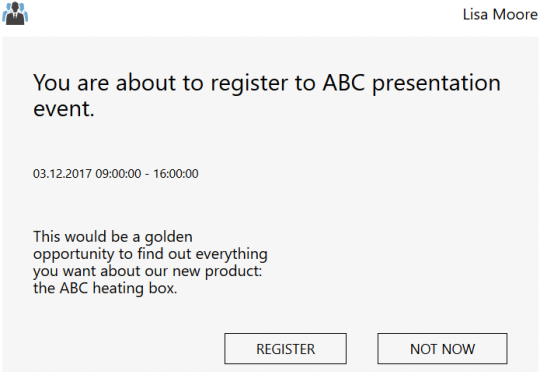
- Not Now For Event. Can be used in cases when you want recipients to be able to register or inform you that they are not coming on the same web page. (Otherwise, works similar to the Register For Event link.)
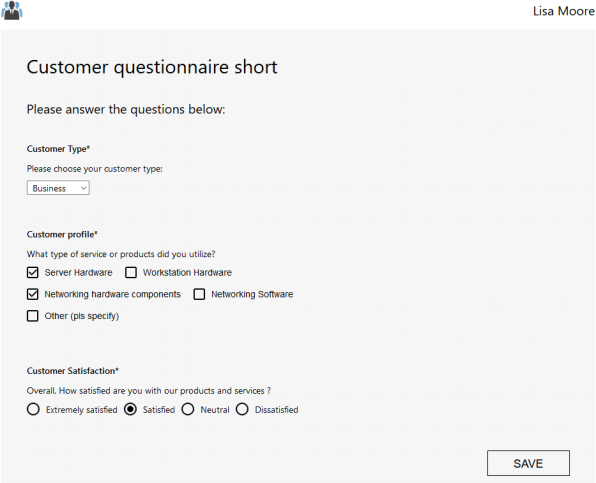
- Questionnaire. Used when you want recipients to answer a set of questions and store their answers in the database. Questionnaires first have to be created in Vine.
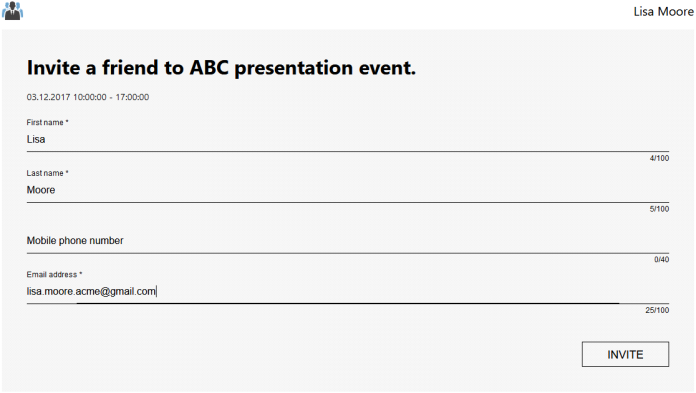
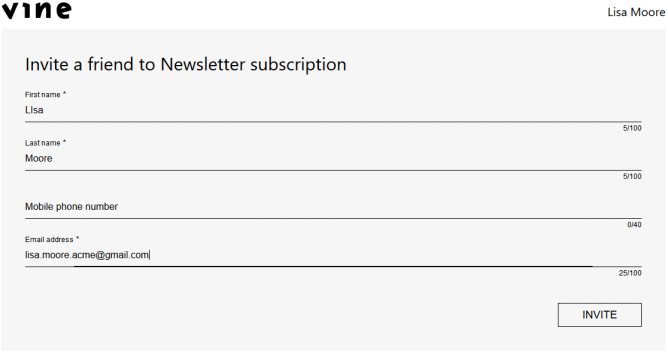
- Invite Friend For Event link. Used when you want recipients to be able to enter contact data and send an invitation email to any person they want to invite for the event. The invitation email will include a link to one more Web page where registration for the event can be accepted (or declined, if accepted earlier).
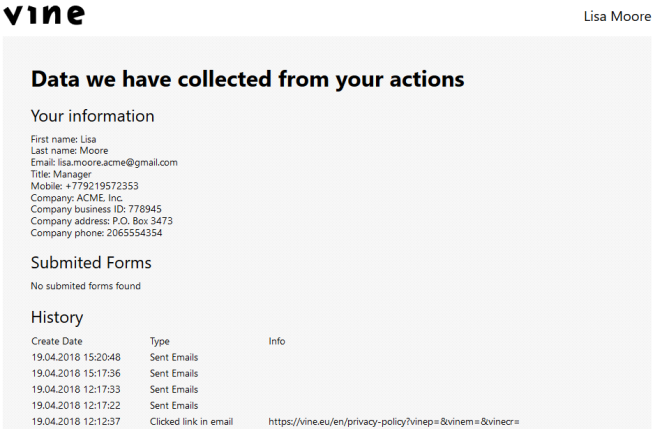
- GDPR - Show Person Data.You can add a link to show all person data required by the GDPR law.
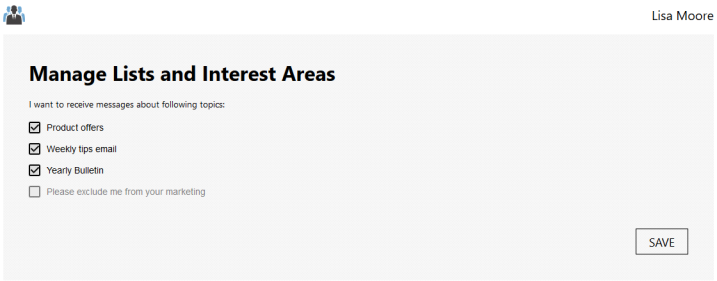
- Verify Email Lists. When email recipients click this link, they will see a page with all email lists they have subscribed to. They can verify and update their email lists.
- Landing Page. When email recipients click this link, they will see the landing page you choose from the Select Page list:
- Unsubscribe. Select this to create an unsubscribe link.
- Suggest a friend to subscribe. When email recipients click this link, a special Customer Web page will open where they can enter contact data for a friend they want to invite to subscribe to this email list. When Invite is clicked the friend will receive an email with a subscribe link.
For a custom link (such as TEL:) you need to enter its link type:
If this link clicked when already registered, then it shows the NOT NOW button allowing to unregister.
Please note that in addition to registration events you can select Event from Automation Trigger for this type of links. In this case, the link will work for the event that started automation in the Registered to Event trigger.
Please note that in addition to registration events you can select Event from Automation Trigger for this type of link. In this case, the link will work for the event that started automation in the Registered to Event trigger.
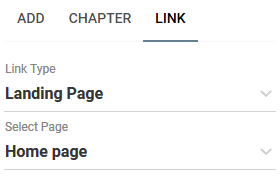
To create a landing page, use the Landing Pages tab on the Web Site page.
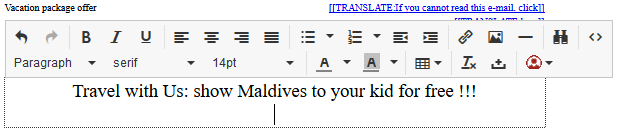
Editing Texts
Click in the text you want to edit and use the editor toolbar commands:
Toolbar Commands
|
Button |
Name/Info |
Description |
|
|
Undo/Redo |
|
|
|
Bold |
Select text and click this to make it bold |
|
|
Italic |
Select text and click this to italicize it |
|
|
Underline |
Select text and click this to underline it |
|
|
Align Left Align Center Align Right Justify |
Select text and click this to align text to the left, center it, align to the right, or justify text ( text spaces adjusted so that the text gets aligned with both the left and right margins) |
|
|
Bulleted List Numbered List |
Click here to insert bulleted and numbered lists. |
|
|
Decrease Indent |
Click this to indent less |
|
|
Increase Indent |
Click this to indent more to the right |
|
|
|
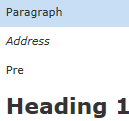
Select text and apply predefined formats, such as paragraph, address, heading levels, etc. |
|
|
Table |
Click here to insert and configure tables |
|
|
Clear Formatting |
Removes the formatting of the selected text |
|
|
Insert Link |
Click here to insert link. |
|
|
Remove Link |
Click this to remove link. |
|
|
Insert/Edit Image |
Click this to insert/edit image, for example a logo image. |
|
|
Find and Replace |
To search for text ( and replace some text with other text if needed) |
|
|
|
Click here to insert Vine elements. |


Keyboard Shortcuts
Ctrl + z - Undo
Ctrl + y - Redo
Ctrl + b - Bold
Ctrl + i - Italic
Ctrl + u - Underline
Ctrl + 1 (2… 6) - h1 – h6
Return - New Paragraph
Shift + Return - line break
Selecting Email Recipients
On the EMAILS / SELECT EMAIL / RECIPIENTS page select a group of people you want to send your email to:
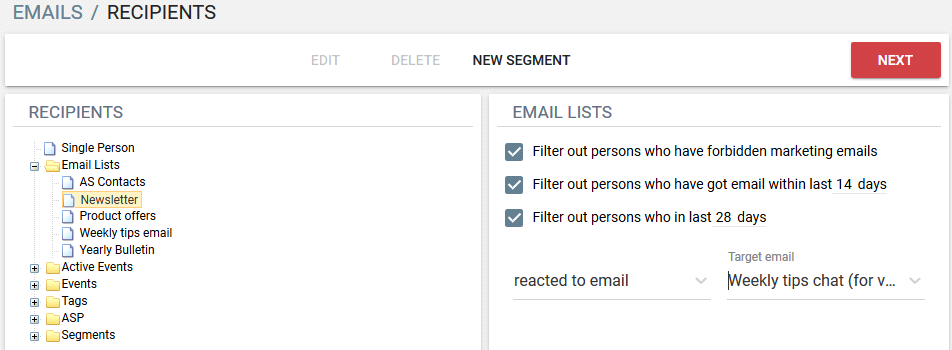
The RECIPIENTS list includes:
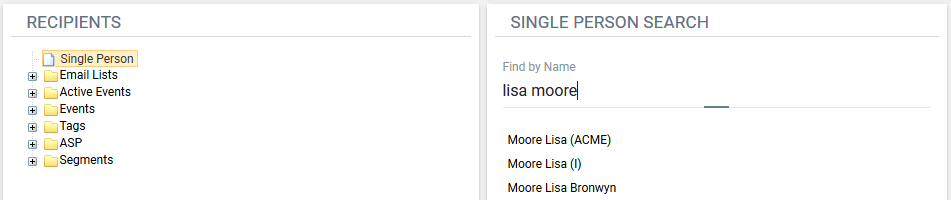
- Single Person. Select this to send an email to one person. Then use the Single Person Search box to find and select the person you want to send your email to.
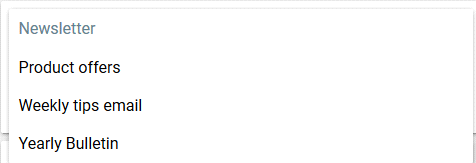
- Email Lists folder includes email lists, one of which you can select as the target list for an email.
- Active Events folder includes a subset of events from The Events folder which start less than a month earlier than today or in the future.
- Events folder shows the same events as in the Events history on the Events page.
- Tags folder includes lists of tagged persons
- In the other folders, you can save target groups(segments) you create in the Vine Marketing Automation and Vine CRM tools.
NOTE: In this version of the Marketing Automation tool you can not edit or delete target groups created in Vine CRM.
For all folders you can:
- Clear Filter out persons who have forbidden marketing emails if you want to send the email also to people who do not want to receive marketing emails (such people are included in the Unsubscribed list).
- Clear Filter out persons who have got email within xx days if you want to send the email also to people who recently got any marketing email from your company. To change the time period in the filter, please click in xx and enter a required number of days.
For email lists, events, and tags you can:
- Select Filter out persons who in last xx days if you want to remove people who did something to a sent email.
To change the time period in the filter, please click in it and enter a required number of days. Available target emails will be updated accordingly.
Then, first, select an email from the Target email list and, after that, select an action: - Opened email - this means that a recipient opened the selected target email in email client.
- Reacted to email - this means that a person did some email related action, such as, clicked a link in the email, registered to event, visited customer web link , downloaded a document and so on.
- Received email - this means that a recipient received the selected target email.
For events, you can additionally specify if you want to send emails to people who:
- Registered. People who registered for the event.
- Participated. People who attended the event.
- No-show. People who registered, but did not attend the event.
- Invited. People invited to the event. When you select Invited you will see an extra setting:
Filter out persons who have registered or informed not coming. Select this if you want to send a reminder email to those who have been invited but have not still registered or decided not to come.
If you want to create a new email list please refer to the Email Lists chapter.
If you want to create a new segment click New Segment.
If you want to edit a segment, select it and click EDIT.
If you want to delete a segment, select it and click DELETE.
Creating or Editing a Segment
- Click
 to select a starting list of contacts which you can filter as needed to create a new segment.
 - Use the Limit customer type filter to select the type of customers you want to search in.
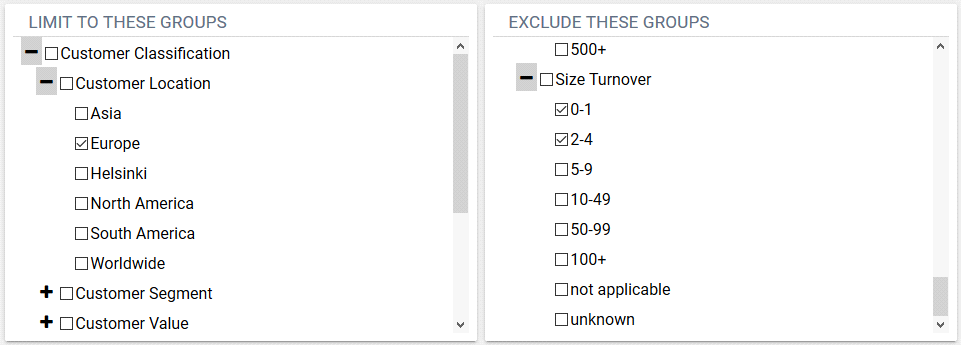
Use the Limit to These Groups and Exclude These Groups filters. These filters include folders from classification and profiling tools in Vine CRM.
- Use the following condition fields to further limit the results to only employees of companies matching the conditions you give:
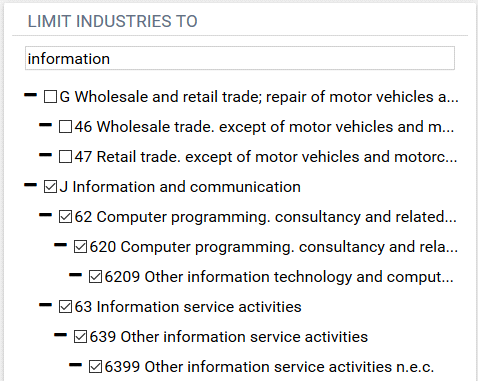
- Use the Limit Industries To filter to select industries you want to limit the companies of your target contacts to. If needed, type a key word in the search box to see only industries with your key word:
- Use the Limit Job Responsibilities To filter to select jobs you want your target contacts to have.
Please note that some people with jobs you have selected can also have the Managing Director job responsibility. Select Remove Managing Directors if you want to additionally remove managing directors from your target group. - If you have access to Vine Address Service then you can select Show Most Common Responsibilities to reduce the number of shown responsibilities and see only the most common ones.
- Click Calculate to see the resulting amount of companies and persons in your target group
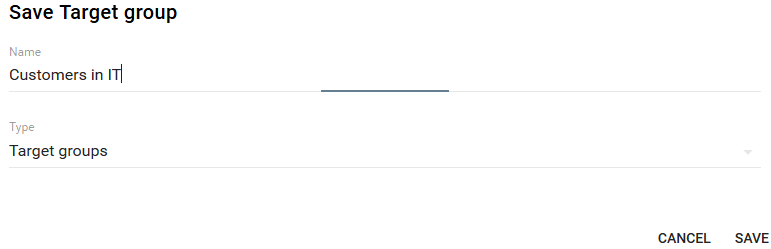
- Click
 to give the group a name, and a type, and store it to the database.
 - Click Save.
- Click Back to Recipients to return to the RECIPIENTS page or click EDIT if you want to continue editing the target group.
Please note that a segment is not a fixed list of persons, but a dynamic search executed each time the members of a segment are needed.
For example, using the following limiting conditions you will only have employees of companies with personnel more than 30 employees and turnover higher than 100 k

The following company fields are used to verify these conditions:
Number of employees - "Personnel" field in the company edit form
Turnover - "Turnover"
Postal code - "Street ZIP"
City - "Street City"
Please note that in Vine the registration date is only available for companies loaded using the Address Service.

Click on the RECIPIENTS page when you have set your target group to go to the SEND EMAIL page.
Sending Email
On the SEND EMAIL page, you can verify and, if needed, adjust the Unsubscribe List and Subject.
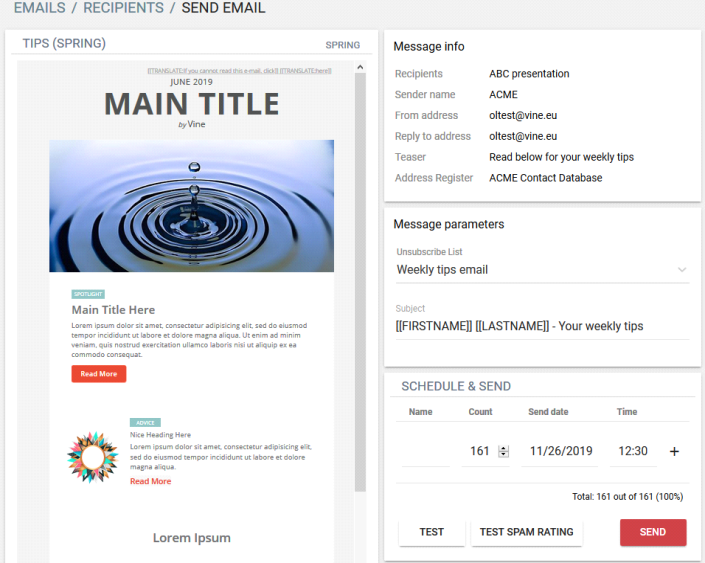
Optionally, you can test your email again.
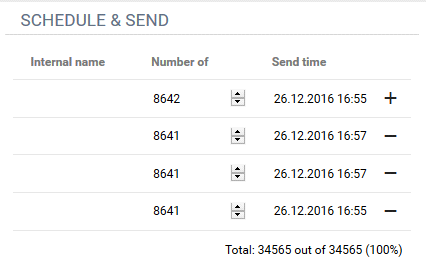
Before sending the e-mails you should specify when you want the emails to be sent. You can split sending emails into several batches instead of sending all your emails at once.
Click +/- to add / remove a delivery batch.
Optionally , you can specify a name and number of sent emails for each batch delivery. The name you give to a batch delivery will be used in the event name created for this delivery. Please note that when you send an email in several batches, its email statistics is also grouped by each batch. So you can investigate email statistics for each sent group as well as the combined statistics for all sent emails.
If there is not many recipients then you will see Mark as test email. Select it if you want the statistics for these emails to be visible only when you select Show Test Emails in the Statistics tab.

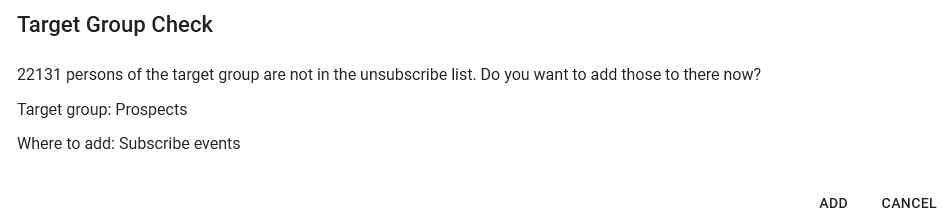
Now click  to deliver your email to all the members of the target group. Your target group will be checked if all its persons are included in the Unsubscribe list. If not then you will be asked if you want to add missing target persons to the unsubscribe list.
The e-mail will be sent and corresponding events of the Email type will be created in Vine database and connected to all recipients.
Please note that the email is sent separately to each recipient so that it holds no information about the other recipients.
Email Statistics
On the Statistics tab you can analyze the total statistics of all emails for a specified time period or the detailed statistics for each email you have sent.
The Summary chart visually shows how many people actually opened or clicked an email from you compared to how many emails you sent:

The chart contains the following data:
- Emails - how many emails you sent using the Emails tool.
This metric counts an email sent to N recipients, as N sent emails. (The number of email recipients is shown by the Count value on the Send Email page.) - Opens - how many emails were opened.
This metric increases when a recipient opens an email for the first time. It does not increase when the same recipient opens the same email again. - Clicks - how many emails in which recipients clicked a link.
This metric increases when a recipient clicks any link in an email for the first time. It does not increase when the same recipient clicks any (same or other) link in the same email again.
Please note that these Summary charts include all recipients compared to the same charts on the Customers and Prospects pages. These charts include emails sent to customers, prospects and even to all users of Marketing Automation tool.
The Statistics pane first shows the total email statistics for all emails sent in the specified time period and then lists statistics for individual emails

Total Messages – shows how many people the listed emails were sent to.
Average Open – shows percentage of opened emails from all sent emails (excluding bounced ones).
Average Click – shows percentage of emails in which a link was clicked from all opened emails.
Lead Count – shows percentage of emails which generated a lead from all opened emails.
Below the statistics pane all emails sent or scheduled to be sent in the set time period are listed:
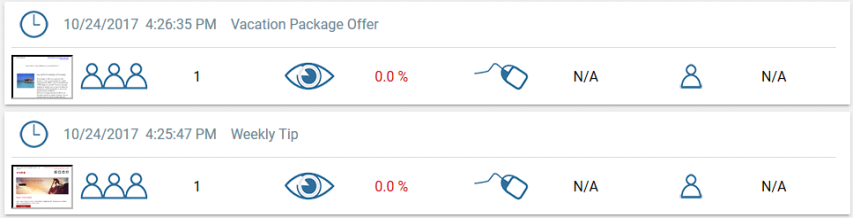
You can hover the mouse pointer over preview images to see what was in each email. Click the preview image to open that email in the Email Editor.
Click an email name to open the statistics for that email using the Metrics page.
You can click the Remove icon  to delete a scheduled email if you do not want to send it any longer. Once an email is sent you will not be able to delete it any longer.

If you want to reconfigure the statistics pane to see a different set of emails, click the dates in the left top corner of the pane or the icon in the top right corner. All the settings of the pane will open and you can change those:
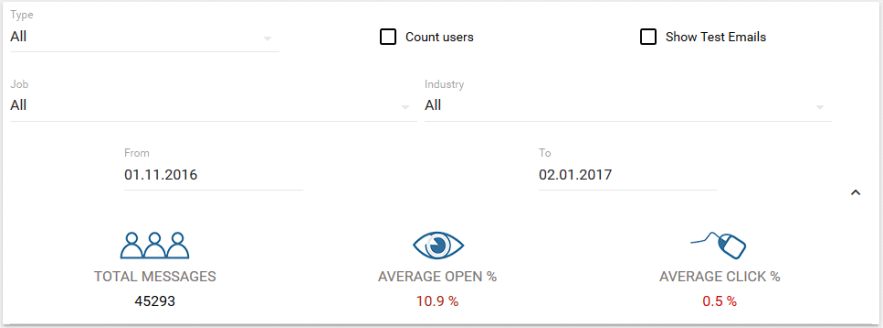
You can configure the set of shown emails by using the following filters:
-
Type. This filter allows viewing statistics separately for the following types of emails:
- Automation: emails sent by automation rules.
- Marketing: emails sent in the Emails tool
- Sales: emails sent in Vine CRM using the Send Email command for persons
- Services: emails sent in Vine CRM from service requests .
-
Count users. Select this if you want emails sent to Vine users of your organization to be counted too.
-
Show test emails. Select this if you want "test" emails to be listed. For example, this will also show emails sent to one person only and emails which have “test” text in the subject and at the same time sent to no more than four persons.
-
Use the From and To time limits to set the time period for sent emails to be included in statistics. Please note that following the GDPR guidelines the tracking data older than 18 months is removed from the Vine database except the data added by site visitor actions, such as, subscriptions, information confirmations, form submissions, and cookie consents.
-
Job Select a job responsibility to only see emails sent to people having the selected responsibility.
-
Industry Select a group to only see emails sent to people working for companies in this industry group.
If you click an email listed by the Statistics pane, it will open the Metrics page for this email.
Metrics page
The Metrics page shows detailed email statistics:

Click Export to Excel if you want to save email statistics data in an Excel file for further processing.
Click the preview image to open the email in the Email Editor.
Each metric has the following columns:
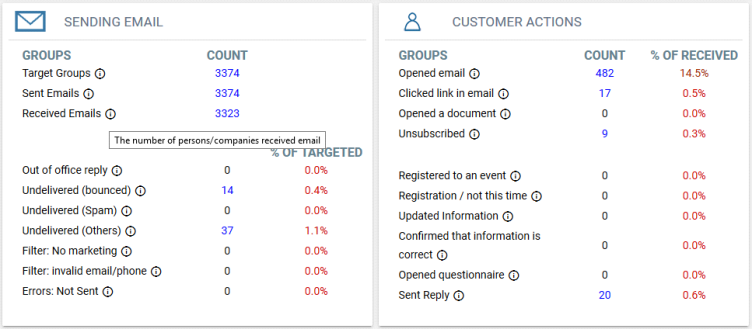
-
Count. Groups metrics for same users, that is, if someone did something several times it will be counted only once. You can click a count to open the detailed list of the metric which will show counts of the metric for persons from the Vine database and their lead scores.
-
% of targeted. Percentages in the left-hand list of metrics are calculated based on the number of sent emails.
-
% of received. Percentages in the right-hand list of email metrics are calculated based on received emails instead of all targeted.
You can find more about each metric by hovering mouse cursor over the  sign. In addition, the meaning of each statistics metric is explained in the following table:
|
Statistic’s type |
Description |
|
Target Group |
All persons/companies selected as targets of the email |
|
Sent Emails |
The number of persons/companies email was sent to |
|
Received Emails |
Shows how many people (or companies) have received the email |
|
Out of office reply |
The number of emails which were sent back from the target email addresses and which Vine Email Reader recognized as out-of-office replies. |
|
Undelivered (bounced) |
The number of emails which Vine Email Reader recognized as “bounced” back. Usually this means that the email address is no longer valid. Emails will no longer be sent to this address |
| Undelivered (spam) | Emails which are considered as spam by the receiving server. Emails will not be sent to this address in the future. |
| Undelivered (Others) | Undelivered emails could happen when, for example, the recipient's Inbox is full. Emails will be sent to this recipient in the future. |
|
Filter: No marketing |
The number of persons/companies who do not want to receive marketing emails (added to the "Unsubscribed" list. |
|
Filter: invalid email/phone |
The number of persons/companies who have invalid email addresses |
|
Errors: Not Sent |
The number of errors which happened when trying to send the email |
|
Lead Count |
The number of leads generated from this email. |
|
Opened email |
The number of people who opened the email in their email clients. This count could be not 100% accurate because of email client security settings which could prevent downloading images from Vine Customer Web. |
|
Went to Web Site |
The number of people who opened a link in this email leading to a web page tracked by your organization. The cookie consent (if present) must be accepted by a visiting person for this count to be increased. |
|
Clicked link in email |
How many clicked a link in the email |
|
Redirected to links |
The number of people who opened any other link in the email not directly related to the Customer Web functionality. |
|
Opened a document |
The number of people who opened a document link in the email |
|
Unsubscribed |
The number of people who used a link in the email, got to the Subscription page on the Customer Web and saved changes. |
|
Registered to an event |
The number of people who used a link in the email, got to the Event page on the Customer Web and registered for the event. |
|
Registration / not this time |
The number of people who used a link in the email, got to the Event page on the Customer Web and unregistered for the event. |
|
Updated Information |
The number of people who used a link in the email, got to the Editing Person page on the Customer Web, and saved changes. |
|
Confirmed that information is correct |
The number of people who used a link in the email, got to the Person page on the Customer Web, and confirmed the data. |
|
Opened questionnaire |
The number of people who opened a Questionnaire link in the email. |
|
Sent Reply |
How many emails received from people which look like valid reply emails |